


































Go2Clock: How to create and apply rotating shift patterns
Rotating shift patterns allow employees to automatically move between different shift patterns on a repeating weekly schedule. Before starting, make sure the individual shift rules you need have been created.
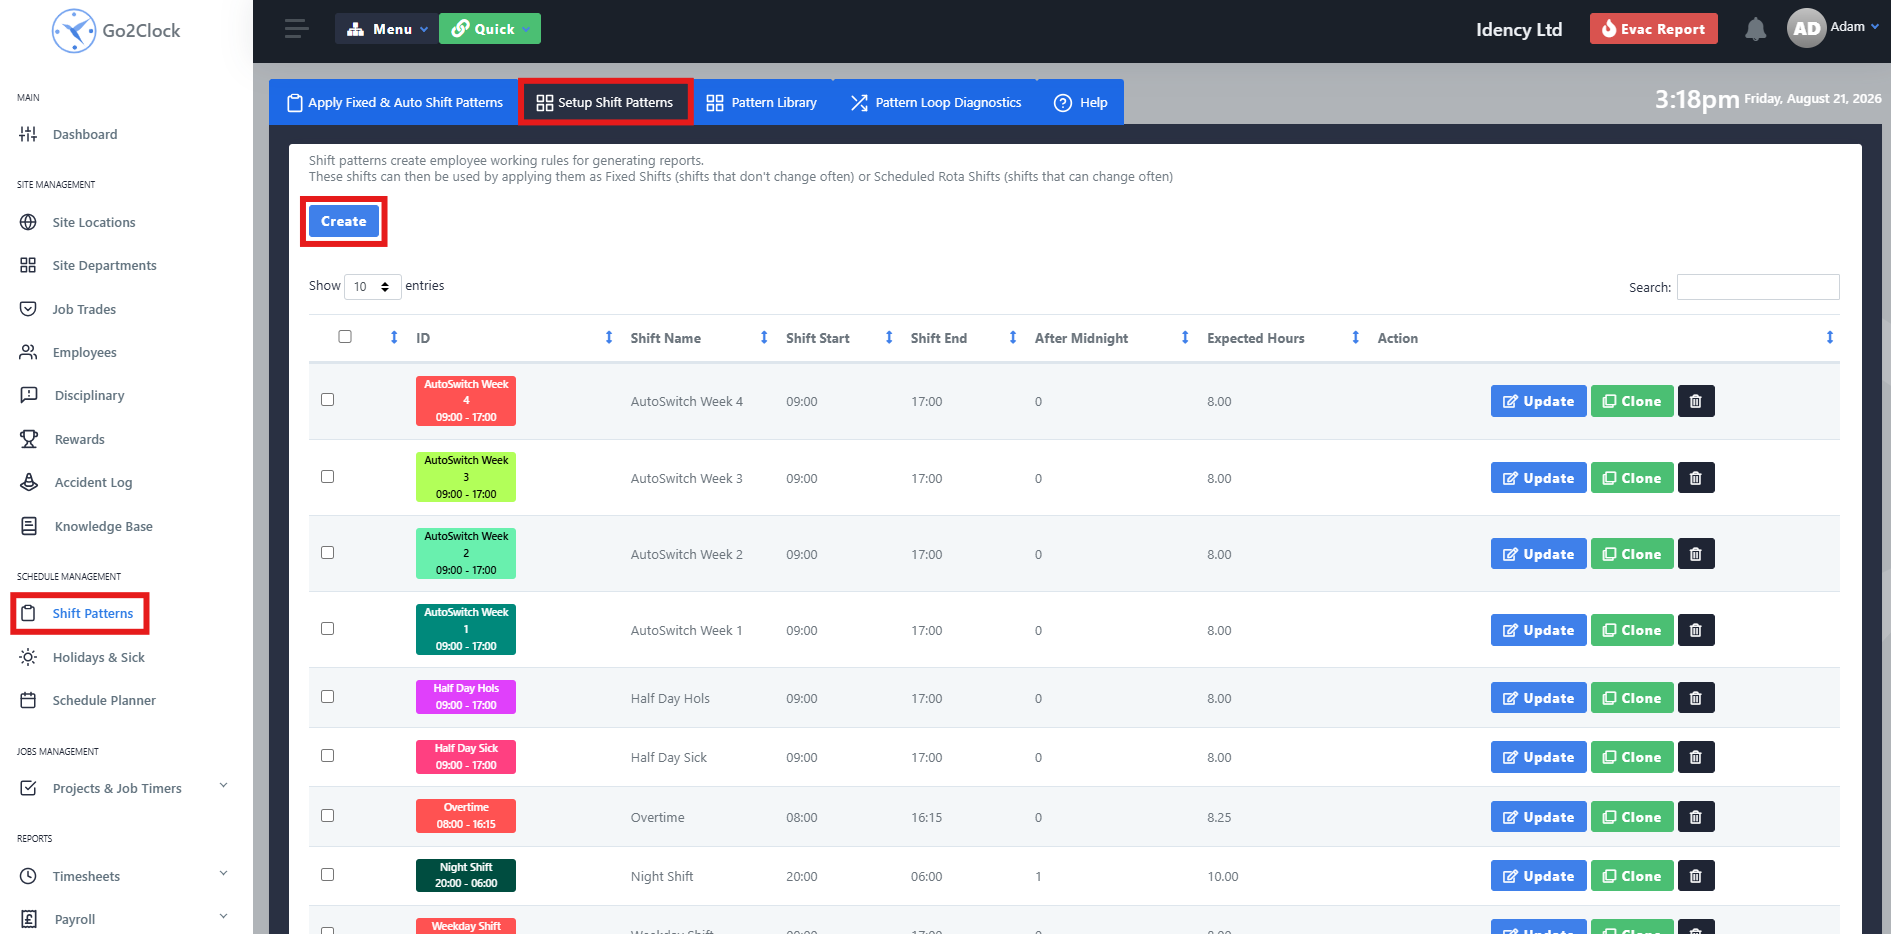
Step 1: Create a Shift Pattern
Each type of shift pattern needs to be created before the rotating shift pattern can be set up. The shift pattern determines the rules applied to the hours worked.
- Navigate to Shift Patterns
- Select Setup Shift Patterns
- Select Create
- Configure the shift pattern as required
- Select Create to save it
Repeat this process until you’ve created all the shift patterns required for the pattern library.
Step 2: Start a New Pattern Library
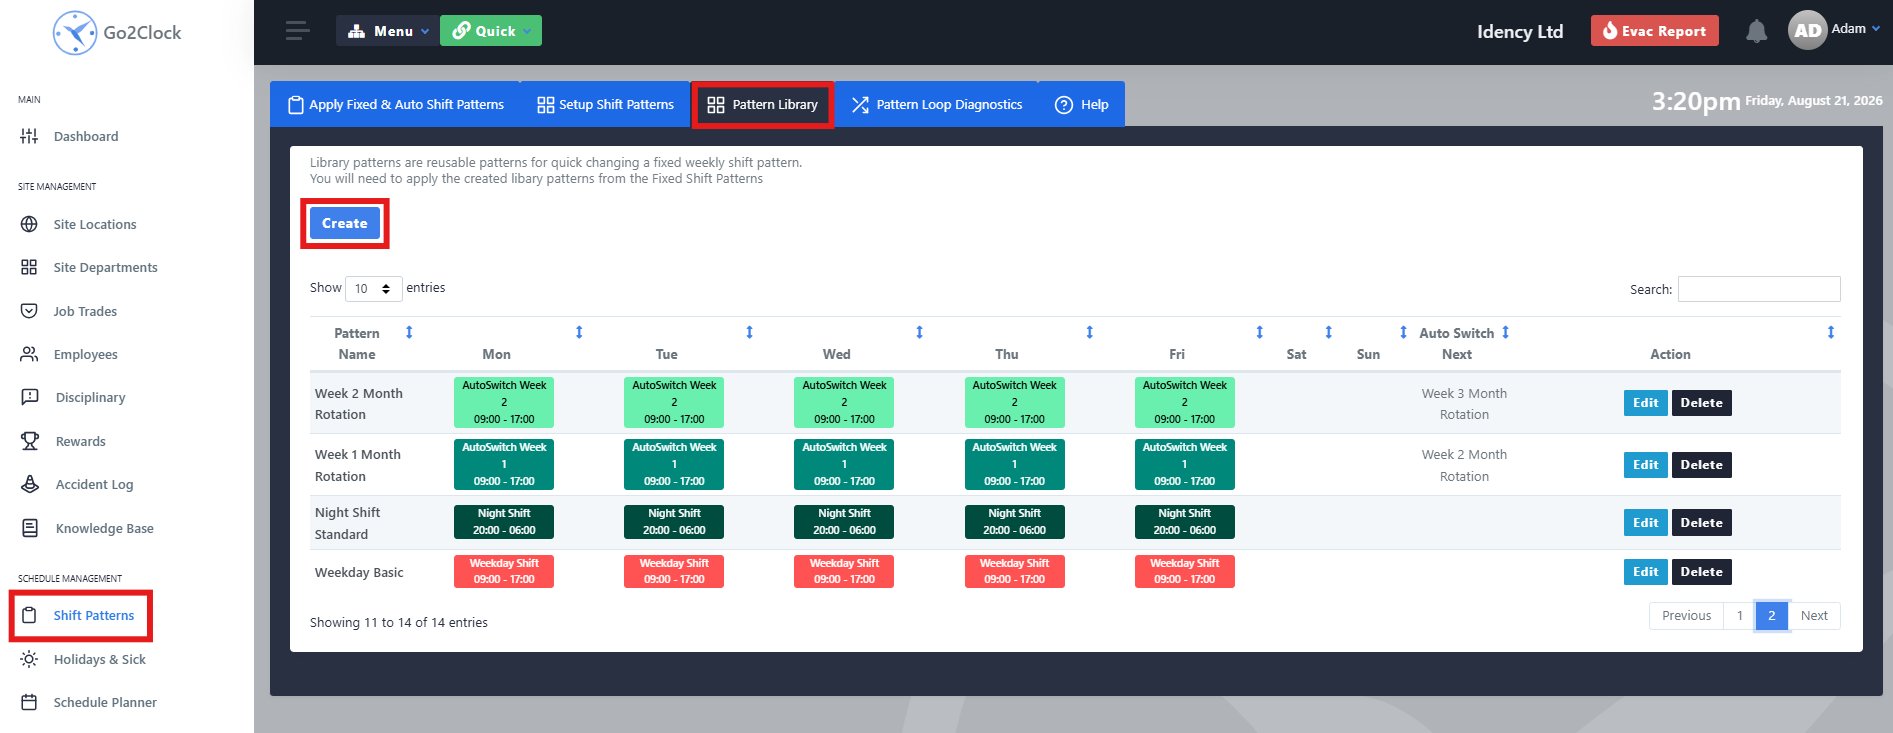
Once all the individual shift patterns have been created, you can set up the pattern library. The pattern library determines which shift pattern is assigned to each day of the employee’s working schedule.
- Navigate to Shift Patterns
- Select Pattern Library
- Select Create
Step 3: Assign Shift Patterns and Name the Week
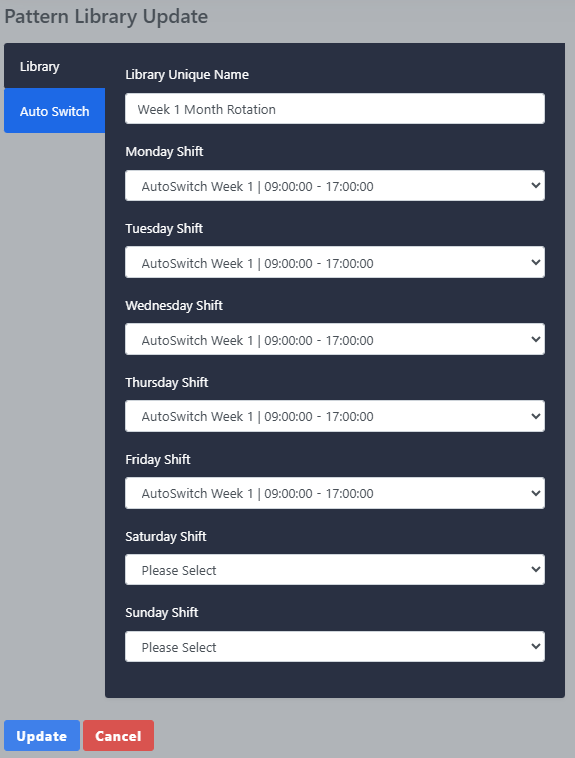
Create the first week of the rotation by assigning the appropriate shift patterns to each day, and name it clearly so it can be easily identified. Repeat this to create each remaining week required for the rotation.
Step 4: Link a Week to the Next
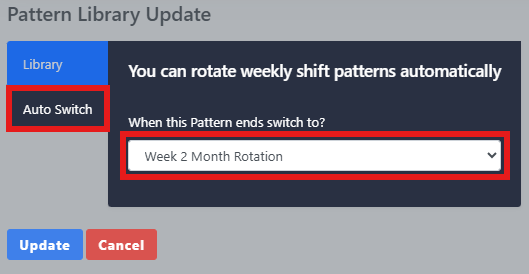
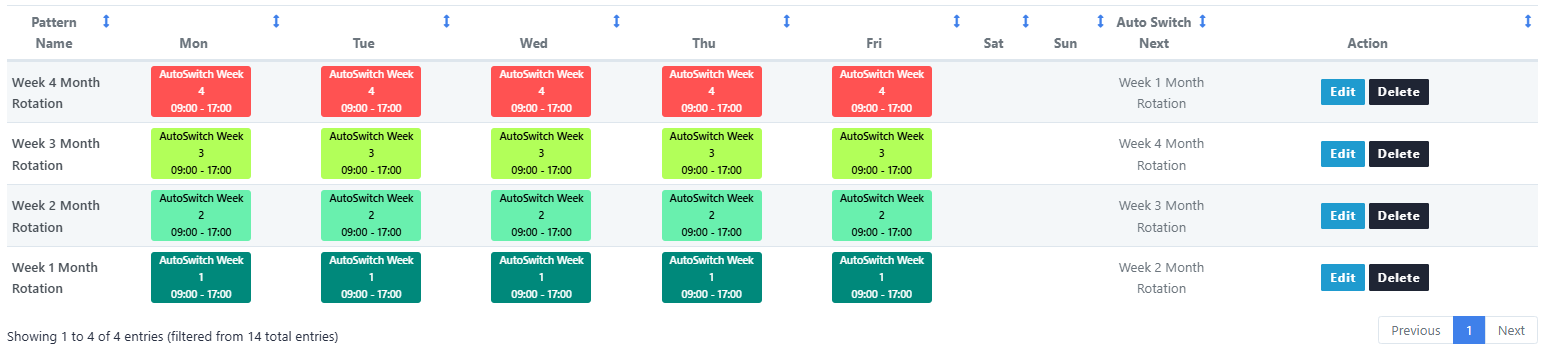
After creating each week, you need to link them together using Auto Switch. This tells Go2Clock which Pattern Library should be applied once the current week has finished.
- Select Edit against the first Pattern Library week.
- Select Auto Switch
- In the dropdown, select the next week’s Pattern Library
- Save the changes
Step 5: Repeat and Close the Loop
Repeat this process for each week in the rotation. The final week should be set to switch back to the first week, creating a continuous cycle. Once all weeks have been linked, the rotating pattern library is ready to be assigned to employees.
Step 6: Apply the Rotating Shift Pattern
Once the pattern library has been created and the weeks linked using Auto Switch,you can assign the rotation to the relevant employees.
- Navigate to Shift Patterns
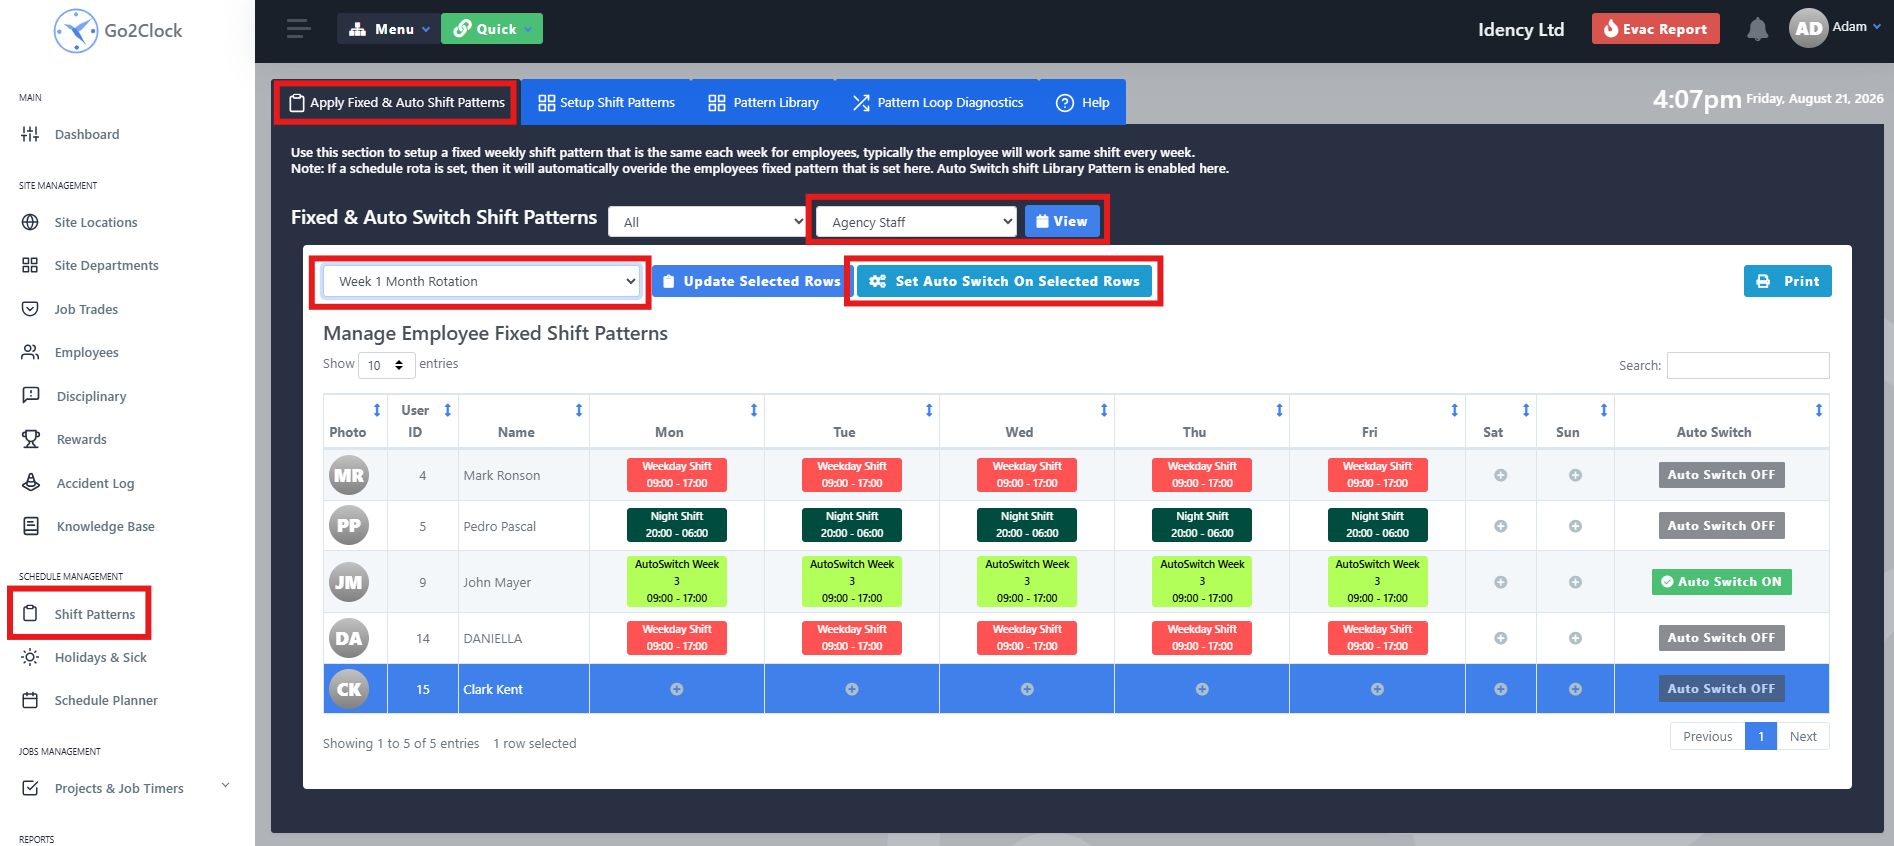
- Select Apply Fixed & Auto Shift Patterns
- Use the department filter to find the employees who should be assigned to the rotating shift pattern
- Select View — the selected row will turn blue, and multiple employees can be selected at once
- From the dropdown in the top-left, select the Pattern Library the employees should start on for the current week
- Select Set Auto Switch On Selected Rows
Step 7: Confirm the Rotation Has Been Applied
Check the employee row to confirm the rotation has been applied successfully. The employee should show with Auto Switch ON and the relevant shift patterns displayed against them for the current week. They’ll automatically move through the linked Pattern Library weeks according to the rotation you’ve configured.

Need help setting up rotating shift patterns?
If you run into any issues creating or applying your rotation, our support team is happy to help.

Go2Clock Cloud Hosted Time & Attendance System

















 English (UK)
  English
  English (Canada)
  Français du Canada
  Svenska
  Português
  Nederlands
  Italiano
  Français
  Español
  Deutsch