


































Creating Clock Punch States in Go2Clock
When an employee clocks on the terminal, the button they press is associated with a code. This code is sent to Go2Clock and must be configured so Go2Clock knows whether the record is an IN, OUT or another clock status. This setup is required when adding a new terminal for the first time.
Step 1: Create the IN Status
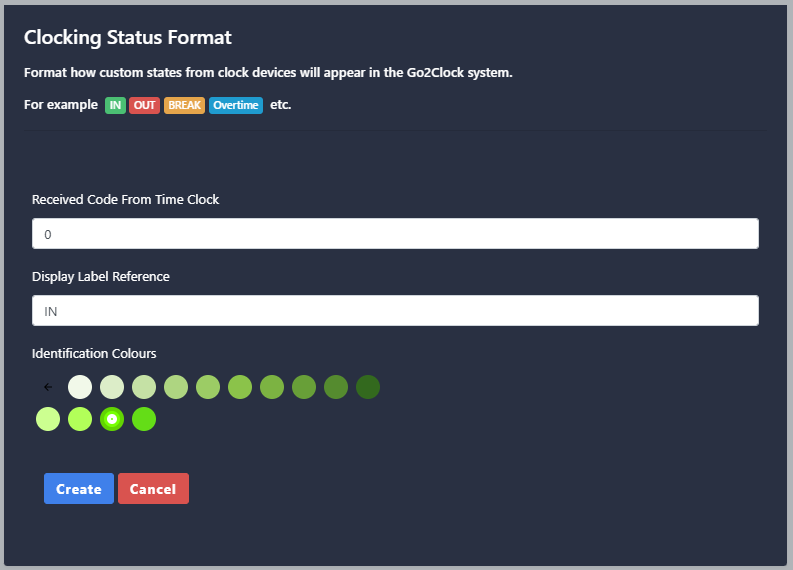
Navigate to System Settings → Clock Punch Status and select Create New. In the Received Code field enter 0. In the Display Label field enter IN. Select a colour for the status — green is recommended. Select Create.
Step 2: Create the OUT Status
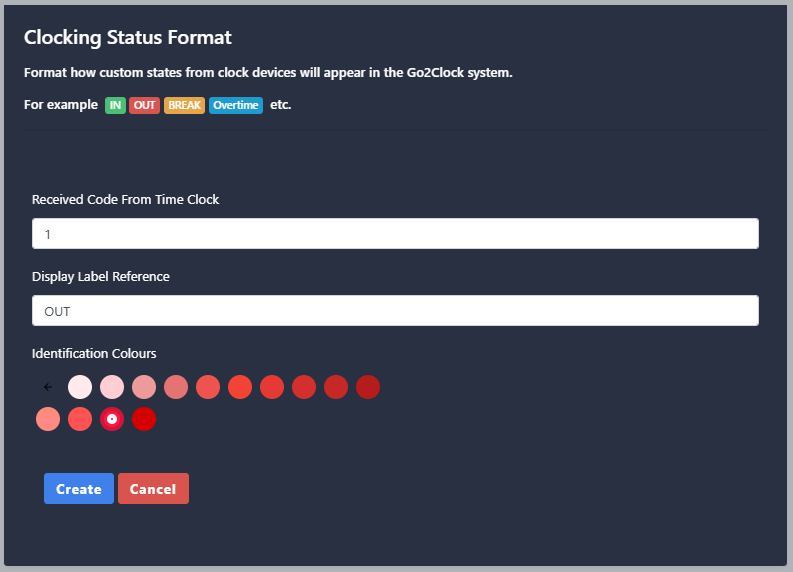
Select Create New again. In the Received Code field enter 1. In the Display Label field enter OUT. Select a colour for the status — red is recommended. Select Create.
If your terminal has additional clocking buttons, repeat the process for each one. Increase the Received Code by 1 for each additional button. For example a third button would use Received Code 2.
Need help setting up Clock Punch Status Codes?
Our team is on hand to help. Get in touch and we’ll guide you through it.

Go2Clock Cloud Hosted Time & Attendance System

















 English (UK)
  English
  English (Canada)
  Français du Canada
  Svenska
  Português
  Nederlands
  Italiano
  Français
  Español
  Deutsch