



































Uitleg over de bedrijfsinstellingenmenu's van IdencyTime
Deze handleiding beschrijft wat elk menu van de Bedrijfsinstellingen doet binnen IdencyTime. Bedrijfsinstellingen zijn ontworpen om eenmalig te worden geconfigureerd en vervolgens met rust te worden gelaten. Om deze reden kan het menu aan de linkerkant worden verborgen.
Sectie 1 | Abonnement
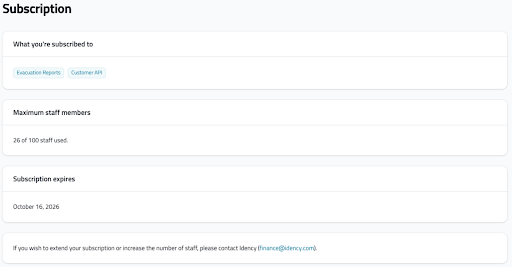
Het menu Abonnement geeft u een overzicht van de modules die in uw IdencyTime-account zijn opgenomen, uw toegestane personeelslimiet en uw vervaldatum. Contactgegevens worden hier ook weergegeven als u vragen heeft over uw abonnement.
Als je over je personeelslimiet heen gaat, nemen we contact met je op. Eerst kijken we of je weer onder de limiet kunt komen. Anders sturen we een factuur als er een verhoging nodig is voor de volgende categorie.
Verlengingsbanners
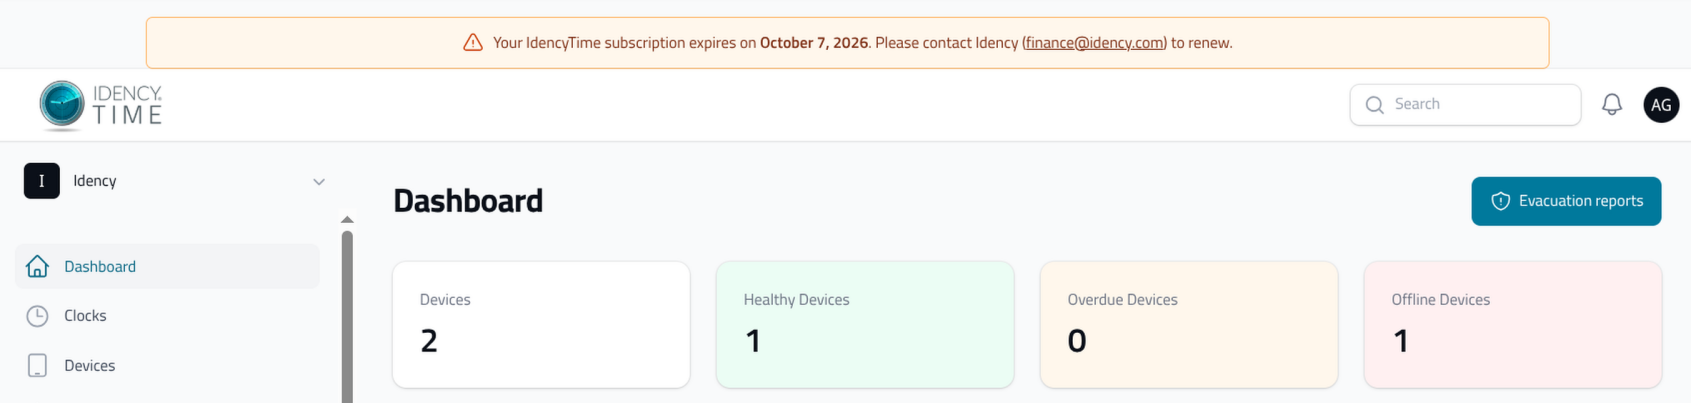
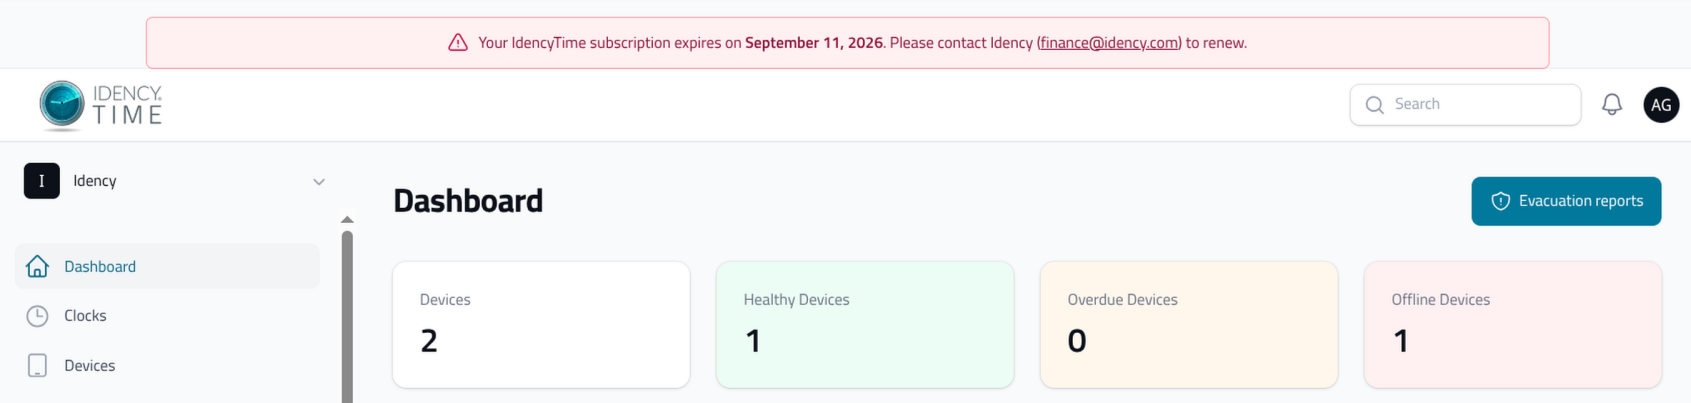
Wanneer je bijna aan het einde van je abonnement bent, verschijnt er een maand vóór de verlengingsdatum een banner bovenaan je account. De banner is de eerste drie weken geel en wordt dan rood wanneer er nog een week over is. Neem contact op met finance@idency.com als u nog geen verlengingsvoorstel heeft ontvangen. Zodra de verlenging is voltooid, verdwijnt de banner en wordt uw nieuwe verlengingsdatum ingesteld.
Sectie 2 | Kloksjablonen
Wat Klok Sjablonen Doen
Kloktemplates worden in IdencyTime gebruikt om de status te identificeren die door medewerkers op het apparaat is geselecteerd. In de meeste gevallen stellen wij uw kloktemplates voor u in op basis van de modules in uw account.
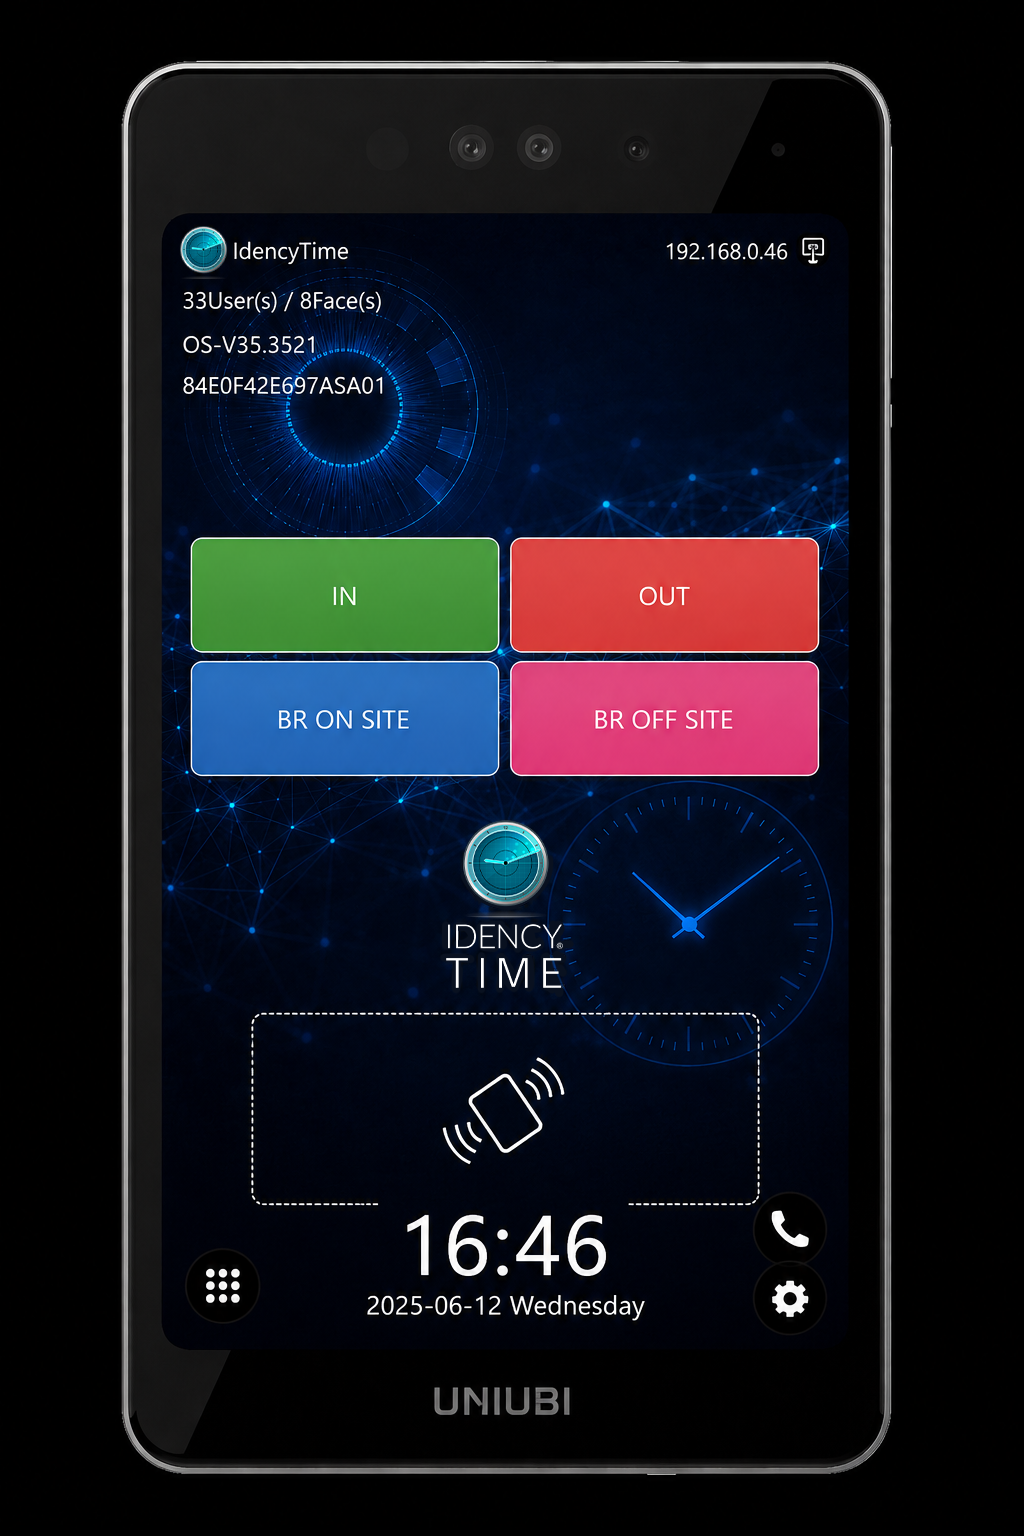
- HR-integratiemodule we stellen het apparaat over het algemeen in met twee staten: IN en UIT
- Evacuatiemodule we stellen het apparaat over het algemeen in met vier knoppen — IN, UIT, Pauze Aanwezig en Pauze Afwezig — zodat u nauwkeurig kunt zien wie er wel of niet aanwezig is wanneer u een rapport draait
Hoe kloksjablonen worden gebruikt per apparaattype
Kloktemplates hebben binnen IdencyTime twee toepassingen, afhankelijk van de apparaten die u hebt aangeschaft.
- Uni-Ubi: Met het kloksjabloon kun je instellen wat de knoppen op het scherm weergeven. Bijvoorbeeld IN, UIT, Nachtdienst of Overwerk. Je kunt ook de kleur van elke knop aanpassen.
- Anviz: Kloksjablonen worden alleen gebruikt om de status die op het apparaat is geselecteerd te koppelen aan IdencyTime
Een kloksjabloon maken
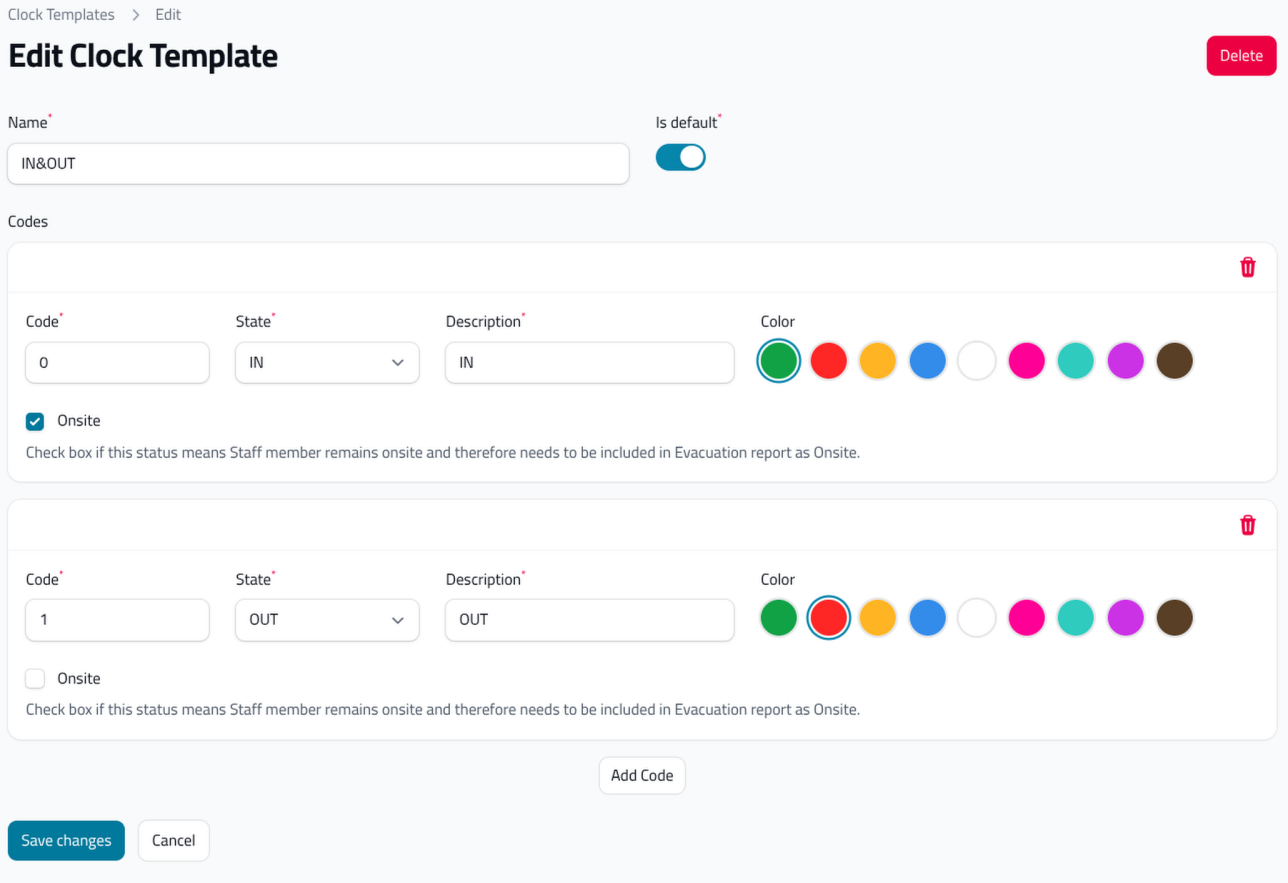
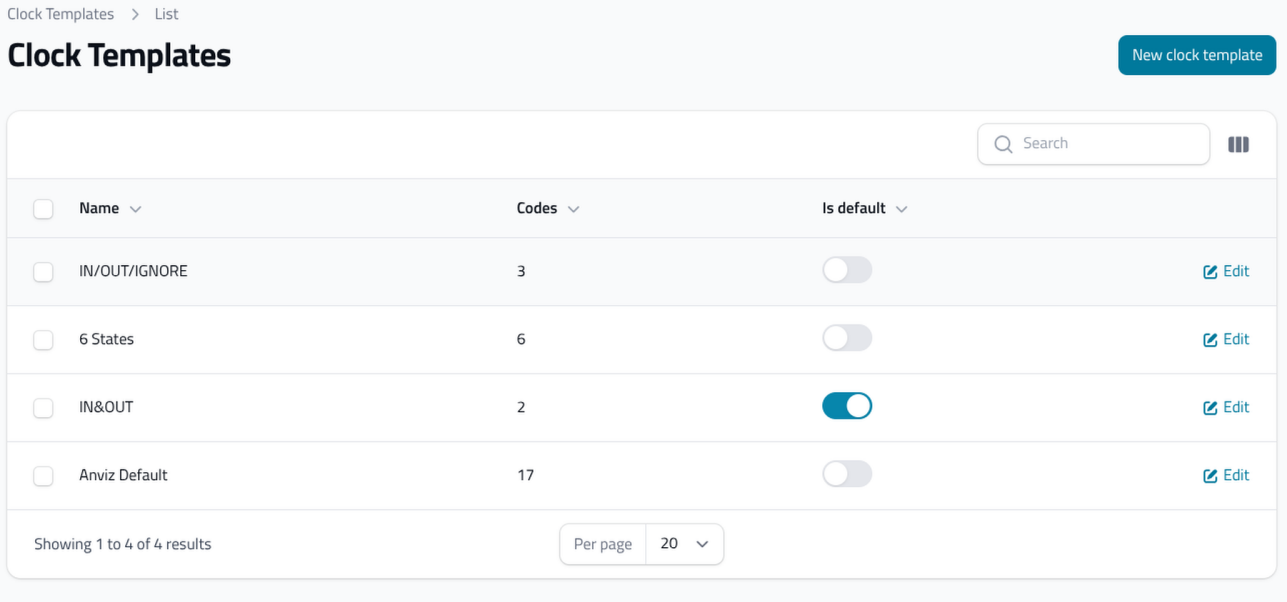
Wanneer u een kloksjabloon maakt, ziet u het volgende menu:
Kloktemplates opslaan en toewijzen
Zodra u klaar bent met het bewerken van uw codes, slaat u de wijzigingen op en verschijnen deze in het menu, klaar om aan apparaten te worden toegewezen. U kunt ook een van de codes instellen als standaard, wat betekent dat elk apparaat dat aan uw account is gekoppeld automatisch deze standaard kloksjabloon overneemt.
Sectie 3 | Afdelingen
Afdelingen maken en gebruiken
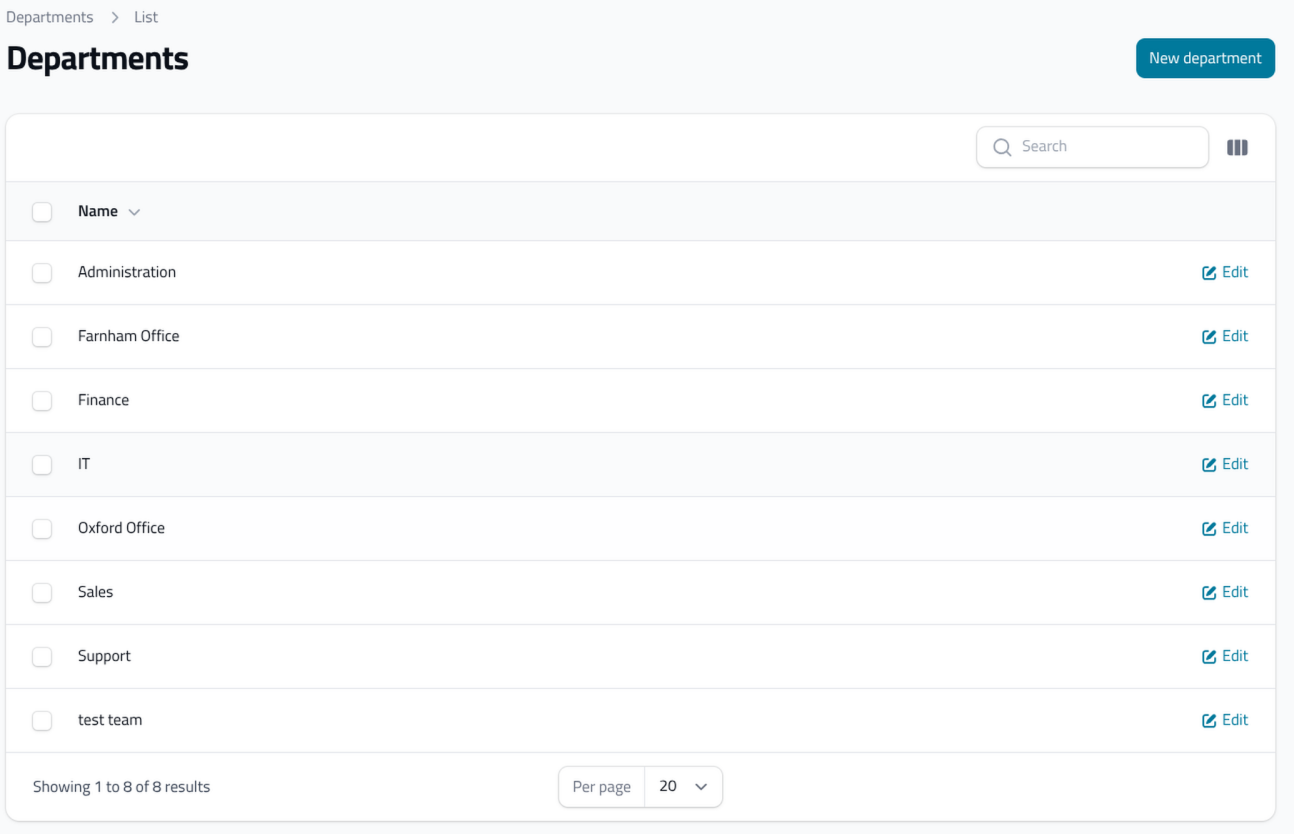
Afdelingen worden gebruikt als filter om te zoeken naar personeel binnen IdencyTime. In de meeste gevallen importeren we ze vanuit uw HR-systeem. Als u handmatig werkt, kunt u zoveel afdelingen aanmaken als nodig is door te selecteren Nieuwe afdeling en er een naam aan te geven. Deze kunnen vervolgens aan medewerkers worden toegewezen, klaar om te worden gefilterd.
Sectie 4 | Apparaatgroepen
Wat doen Apparaatgroepen?
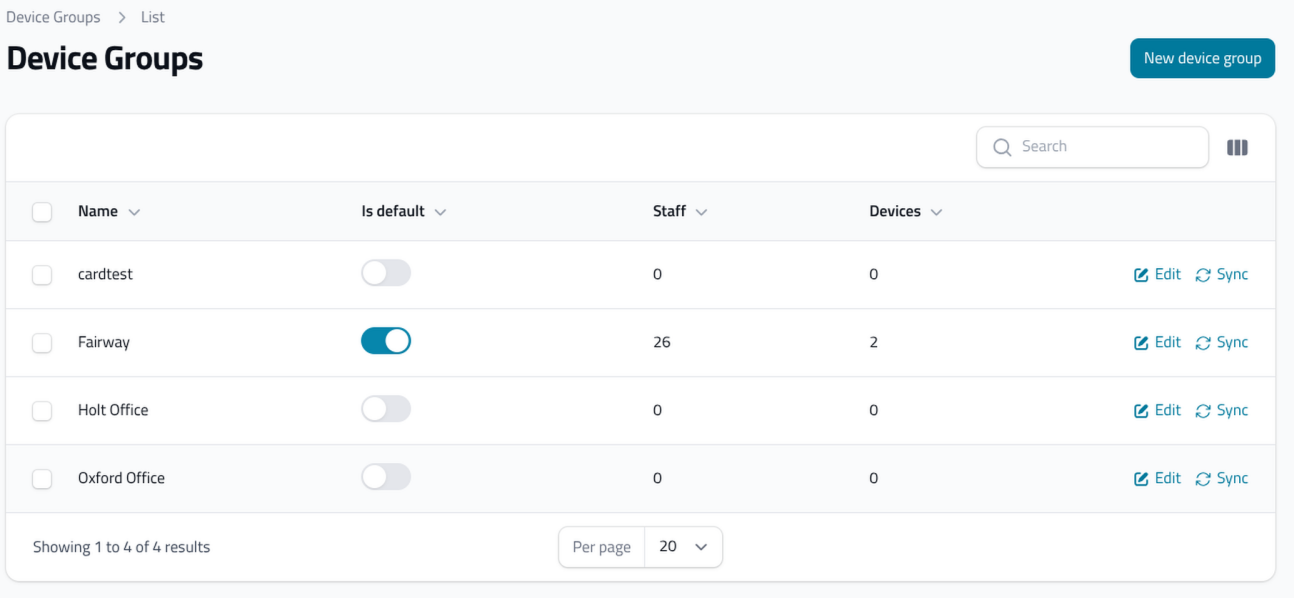
Apparaatgroepen zorgen ervoor dat medewerkers worden gekoppeld aan de juiste apparaten binnen uw bedrijf. Sommige bedrijven hebben genoeg aan één apparaatgroep, wat betekent dat iedereen op elk apparaat kan inklokken. Anderen willen beperken wie op welk apparaat kan inklokken, en dat is waar Apparaatgroepen van pas komen.
Een Apparaatgroep kan aan één apparaat worden gekoppeld, maar personeel kan aan meerdere Apparaatgroepen worden gekoppeld. Als u uw personeel wilt opsplitsen met behulp van Apparaatgroepen, moet u eerst een standaardgroep maken waarin ze allemaal vanuit het HR-systeem worden gesynchroniseerd.
Personeel toevoegen aan een apparaatgroep
Zodra uw apparaatgroepen zijn gemaakt, kunt u er personeel aan toevoegen. Ga naar de personeelslijst, selecteer personeel en masse en selecteer vervolgens Apparaatgroep toevoegen/verwijderen.Een Apparaatgroep kan aan één apparaat worden gekoppeld, maar medewerkers kunnen aan meerdere Apparaatgroepen worden gekoppeld. Als u uw medewerkers wilt opsplitsen met behulp van Apparaatgroepen, moet u eerst een standaardgroep maken waarin ze allemaal worden gesynchroniseerd vanuit het HR-systeem.
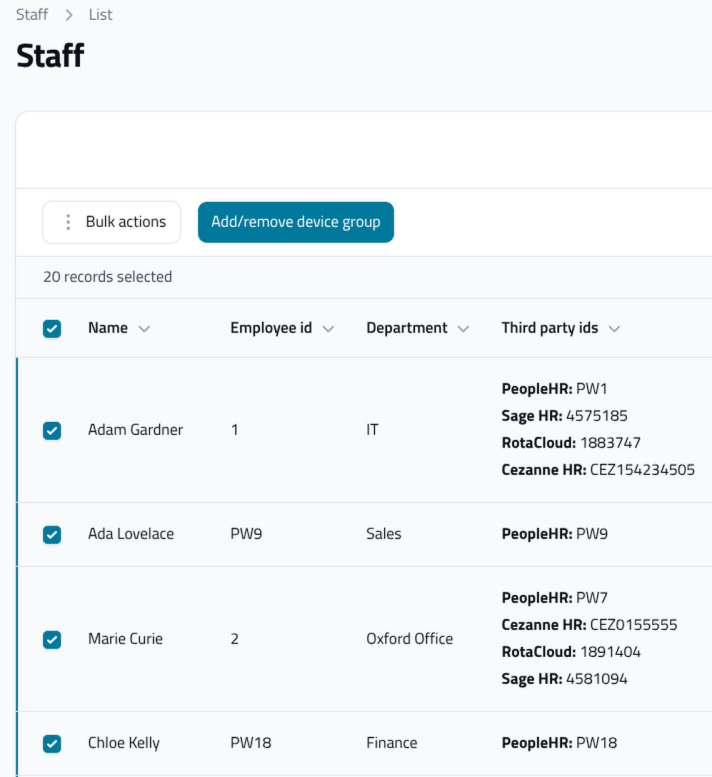
Het Apparaatselectie-groep
Selecteer de Apparaatgroep in het vervolgkeuzemenu en selecteer vervolgens Stuur in.
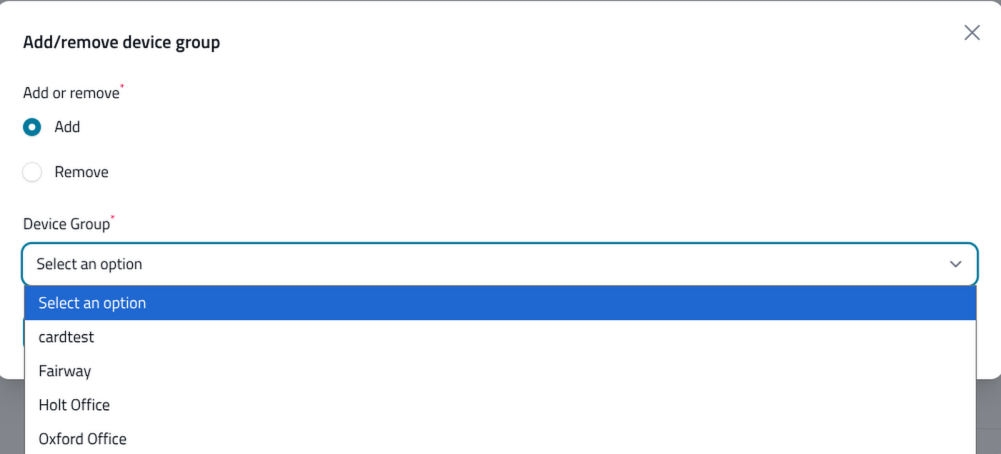
Een apparaatgroep toevoegen aan een apparaat
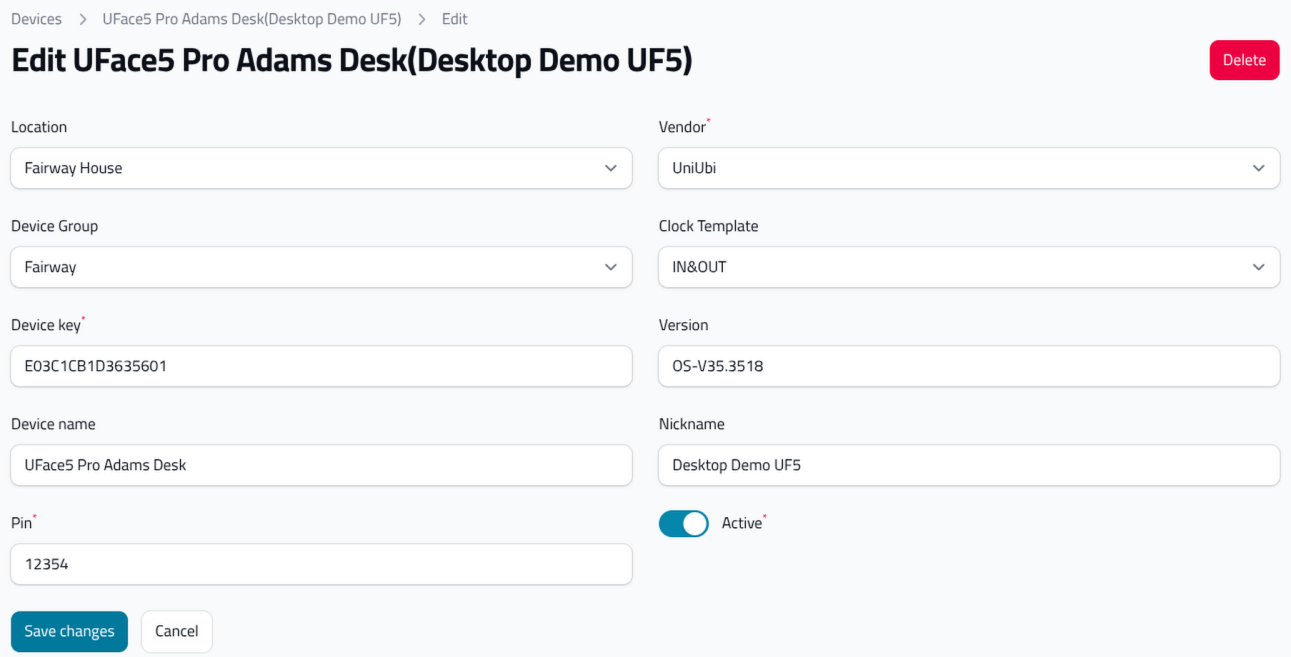
De laatste stap is het toevoegen van de Apparaatgroep aan het apparaat. Navigeer naar het menu Apparaten, selecteer Bewerk zoek op het apparaat waaraan u een apparaatgroep wilt toevoegen de groep op in het vervolgkeuzemenu en selecteer deze Wijzigingen opslaan. Eenmaal toegevoegd, wordt het personeel automatisch naar het apparaat gesynchroniseerd, klaar om gezichten, vingerafdrukken, kaarten of pincodes aan hun profielen toe te voegen.
Sectie 5 | Locaties
Een locatie aanmaken
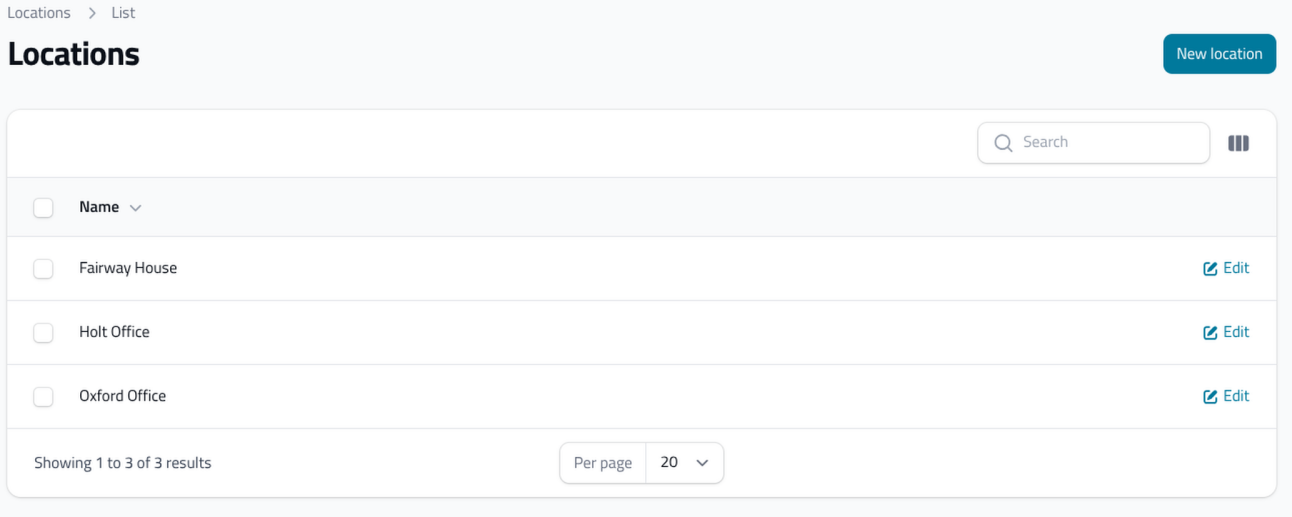
Locaties worden binnen IdencyTime gebruikt om bij te houden vanwaar een gebruiker heeft ingeklokt. Een locatie kan aan vele apparaten worden gekoppeld. Om er een aan te maken, selecteer je Nieuwe locatie en geef het een naam. Deze kunnen vervolgens vanuit het Apparaten-menu aan apparaten worden toegevoegd.
Locaties worden ook gebruikt als het primaire filter in het Evacuatie-rapport. U kunt hier meer vinden: Hoe het IdencyTime Evacuation Report te gebruiken
Hulp nodig bij het vinden van uw weg binnen IdencyTime?
Als je vragen hebt over het dashboard, apparaten, medewerkers of een ander menu, helpt ons supportteam je graag.
IdencyTime – Tijd- en aanwezigheids-API en T&A-integraties

















 English (UK)
  English
  English (Canada)
  Français du Canada
  Svenska
  Português
  Nederlands
  Italiano
  Français
  Español
  Deutsch