



































Förklaring av företagsinställningsmenyer för IdencyTime
Den här guiden beskriver vad varje meny i Inställningar för företag gör inom IdencyTime. Inställningar för företag är utformade för att ställas in en gång och sedan lämnas i fred. Av den anledningen kan menyn döljas på vänster sida.
Avsnitt 1 | Prenumeration
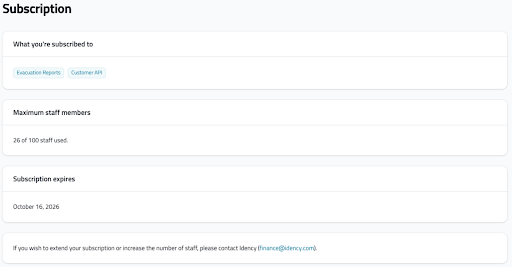
Prenumerationsmenyn ger dig en översikt över modulerna som ingår i ditt IdencyTime-konto, din tillåtna personalgräns och ditt utgångsdatum. Kontaktdetaljer visas också här om du har några frågor om din prenumeration.
Om du överskrider din personalgräns kommer vi att kontakta dig. Först ser vi om du kan komma tillbaka under gränsen. Annars skickar vi en faktura om en ökning behövs för nästa beloppskategori.
Förnyelsebanners
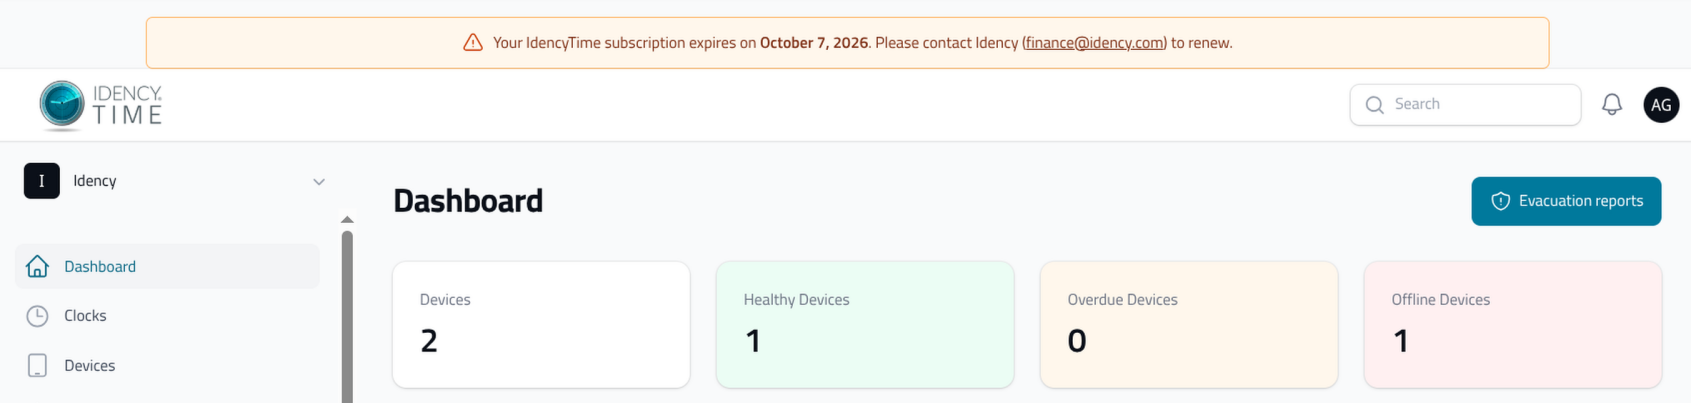
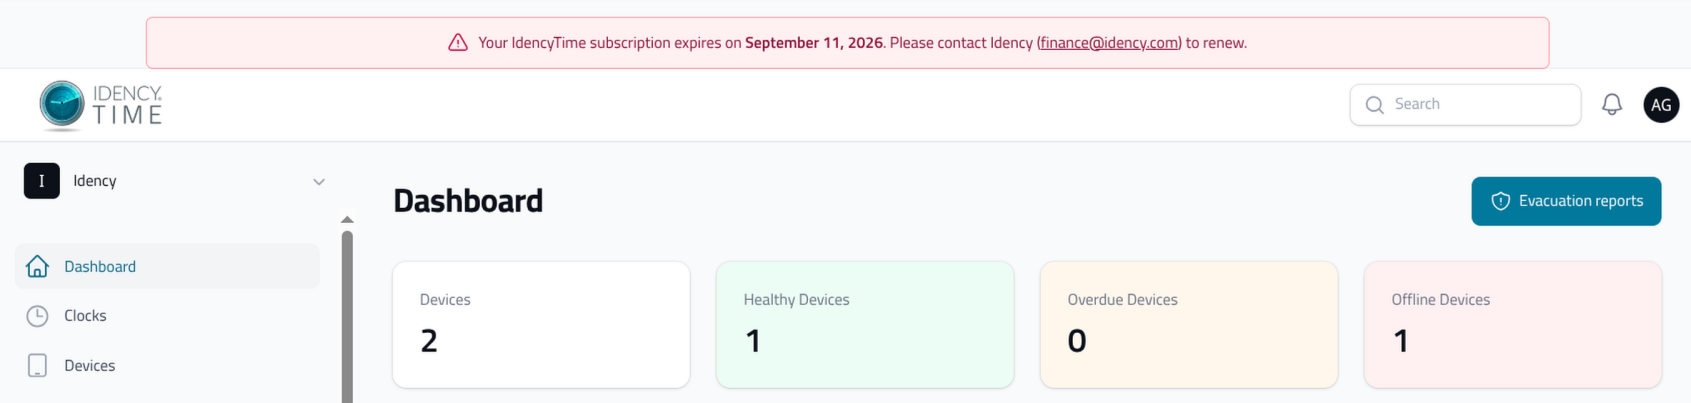
När du närmar dig slutet av din prenumeration visas en banner längst upp i ditt konto en månad innan förnyelsedatumet. Banneret är gult under de första tre veckorna och blir sedan rött när det återstår en vecka kvar. Kontakta finance@idency.com Om du inte har fått en uppdaterad offert. När förnyelsen är klar försvinner banderollen och ditt nya förnyelsedatum ställs in.
Avsnitt 2 | Klockmönster
Vilka klockmönster finns tillgängliga?
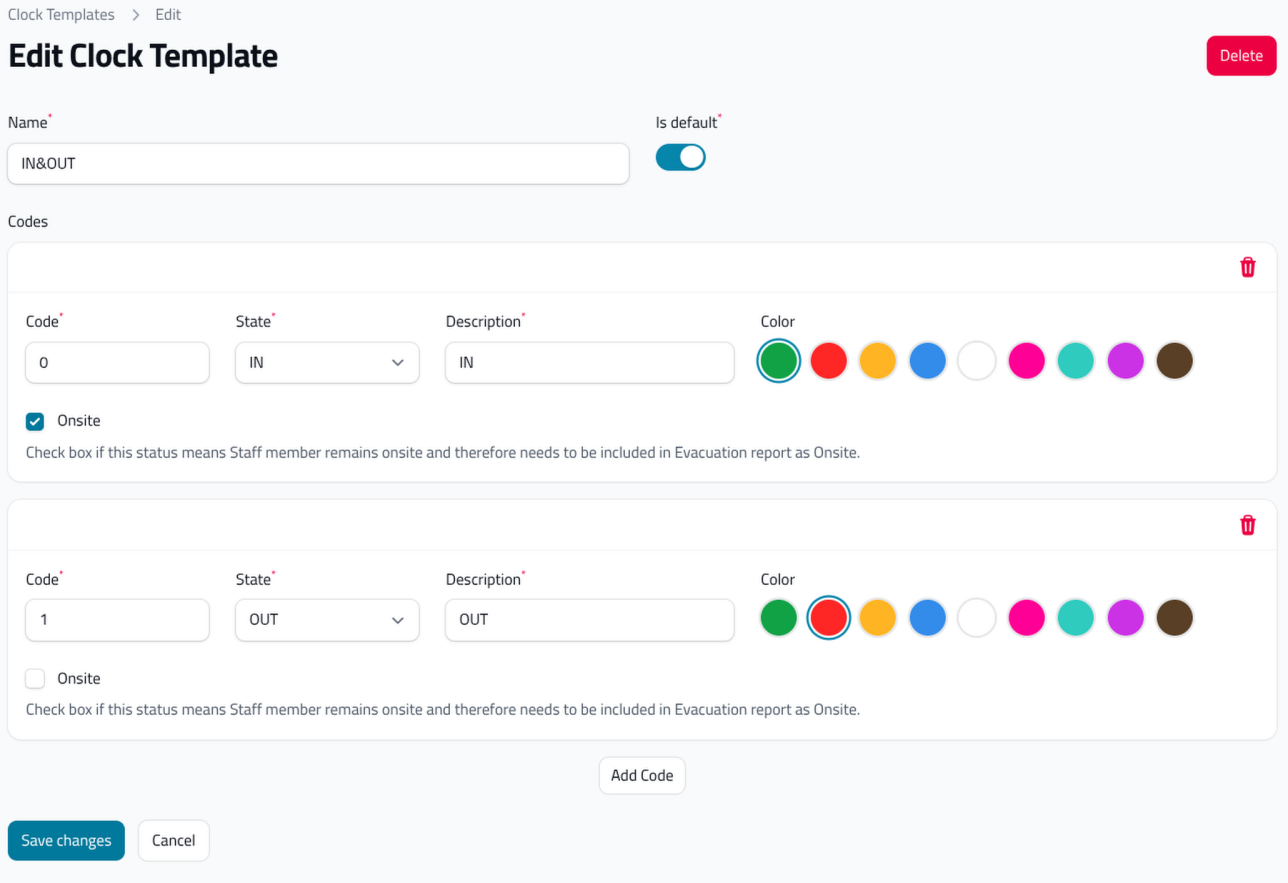
Klockmönster används i IdencyTime för att identifiera det tillstånd som personalen väljer på enheten. I de flesta fall konfigurerar vi dina klockmönster åt dig baserat på modulerna som ingår i ditt konto.
- Modul för HR-integration: Vi ställer vanligtvis in enheten med två tillstånd, IN och OUT
- Evakueringsmodul: Vi ställer vanligtvis in enheten med fyra knappar – IN, OUT, Break On Site och Break Off Site – så att du kan se exakt vem som är på eller borta från platsen när du skapar en rapport.
Hur klockmönster används beroende på enhetstyp
Klockmönster har två användningsområden inom IdencyTime, beroende på vilka enheter du har köpt.
- Uni-Ubi: Klockmallen kan ställa in vilka knappar som ska visas på skärmen. Till exempel IN, OUT, Nightshift eller Overtime. Du kan också anpassa färgen på varje knapp.
- Anviz: Klockmönster används endast för att matcha det tillstånd som är valt på enheten med IdencyTime.
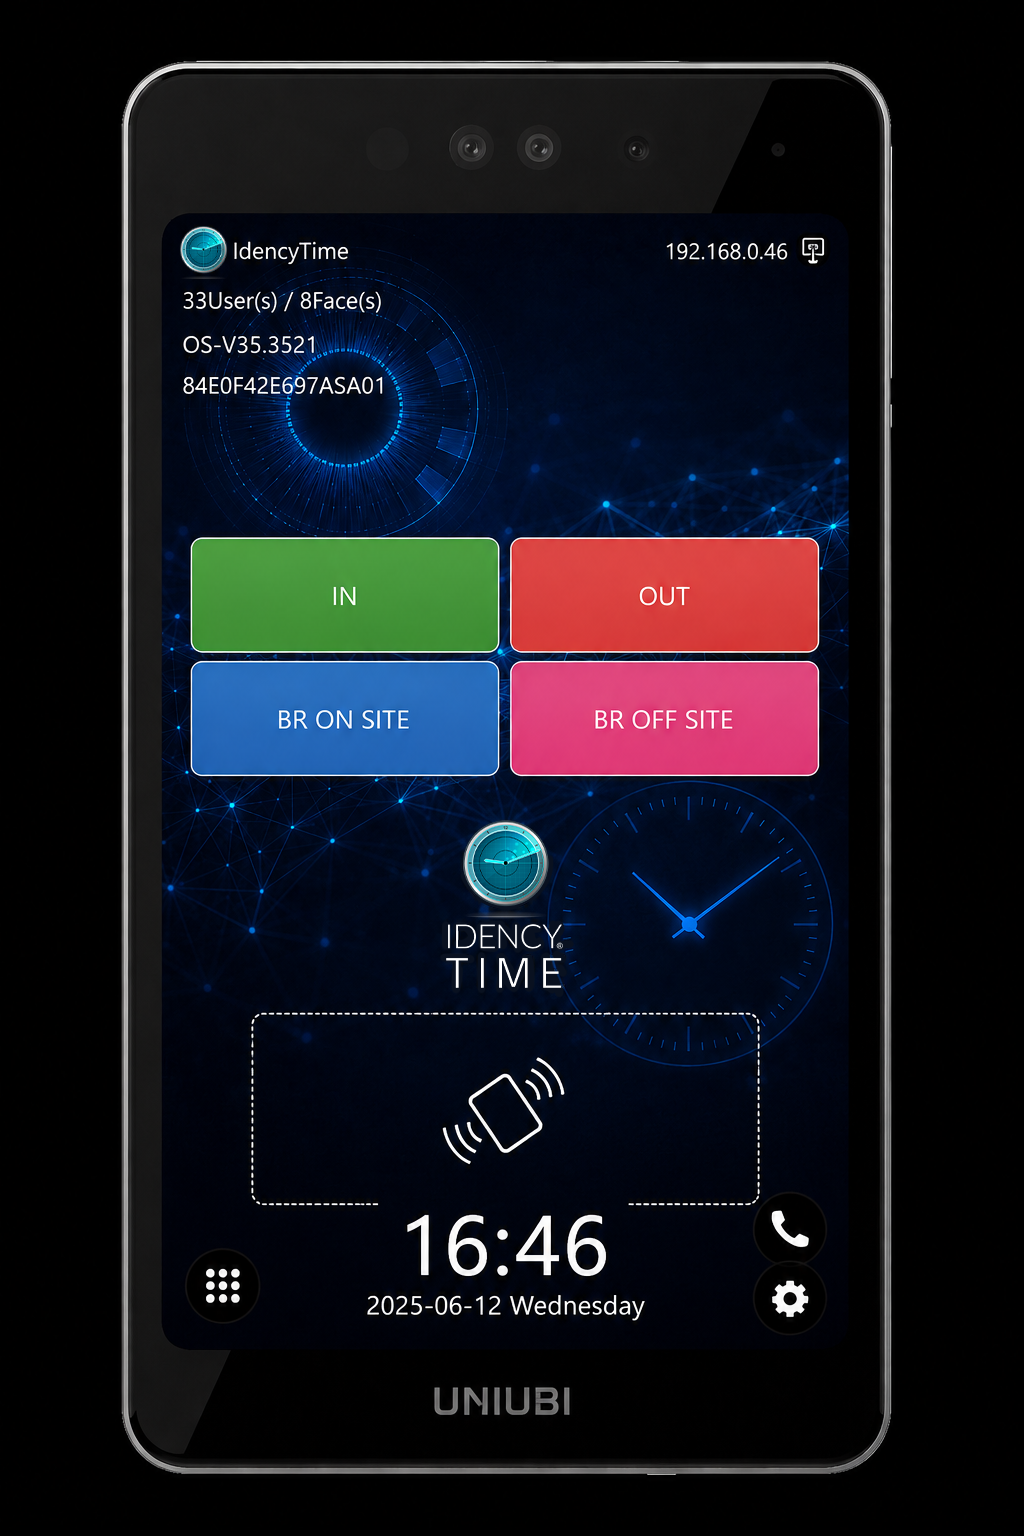
Att skapa en klockmall
När du skapar en klockmall kommer du att se följande meny:
Spara och tilldela klockmallar
När du har avslutat redigeringen av koderna kan du spara ändringarna och de kommer att visas i menyn och vara redo att tilldelas enheter. Du kan också ställa in en av koderna som standard, vilket innebär att alla enheter som är anslutna till ditt konto automatiskt kommer att välja den här standardklockmallen.
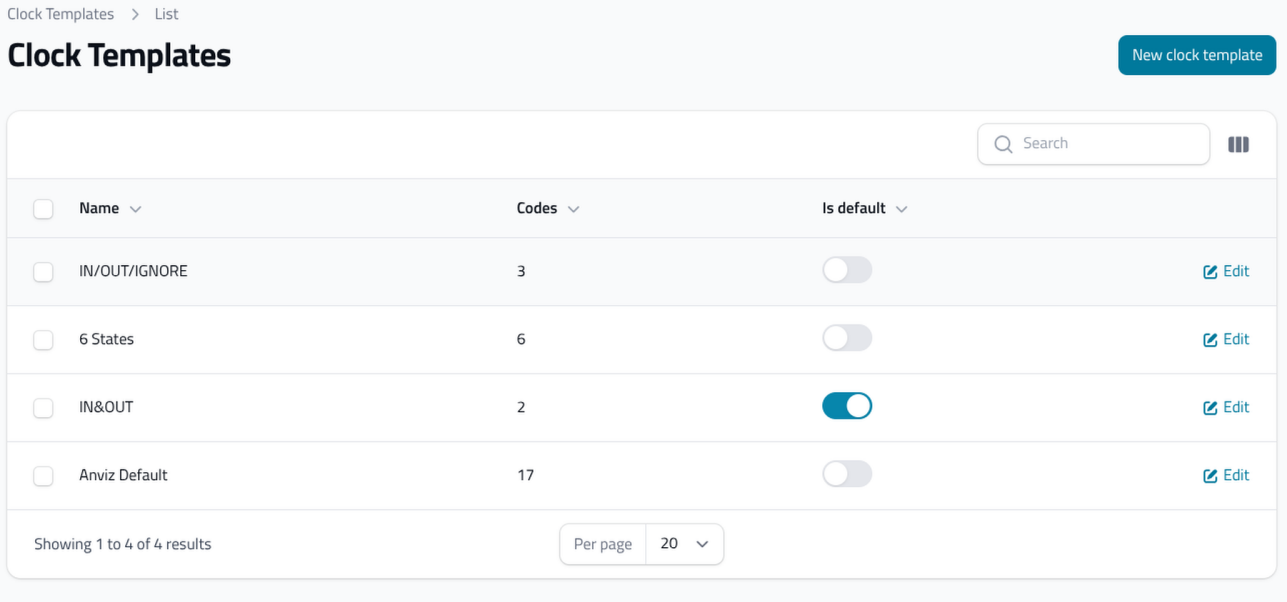
Avdelningar | Avsnitt 3
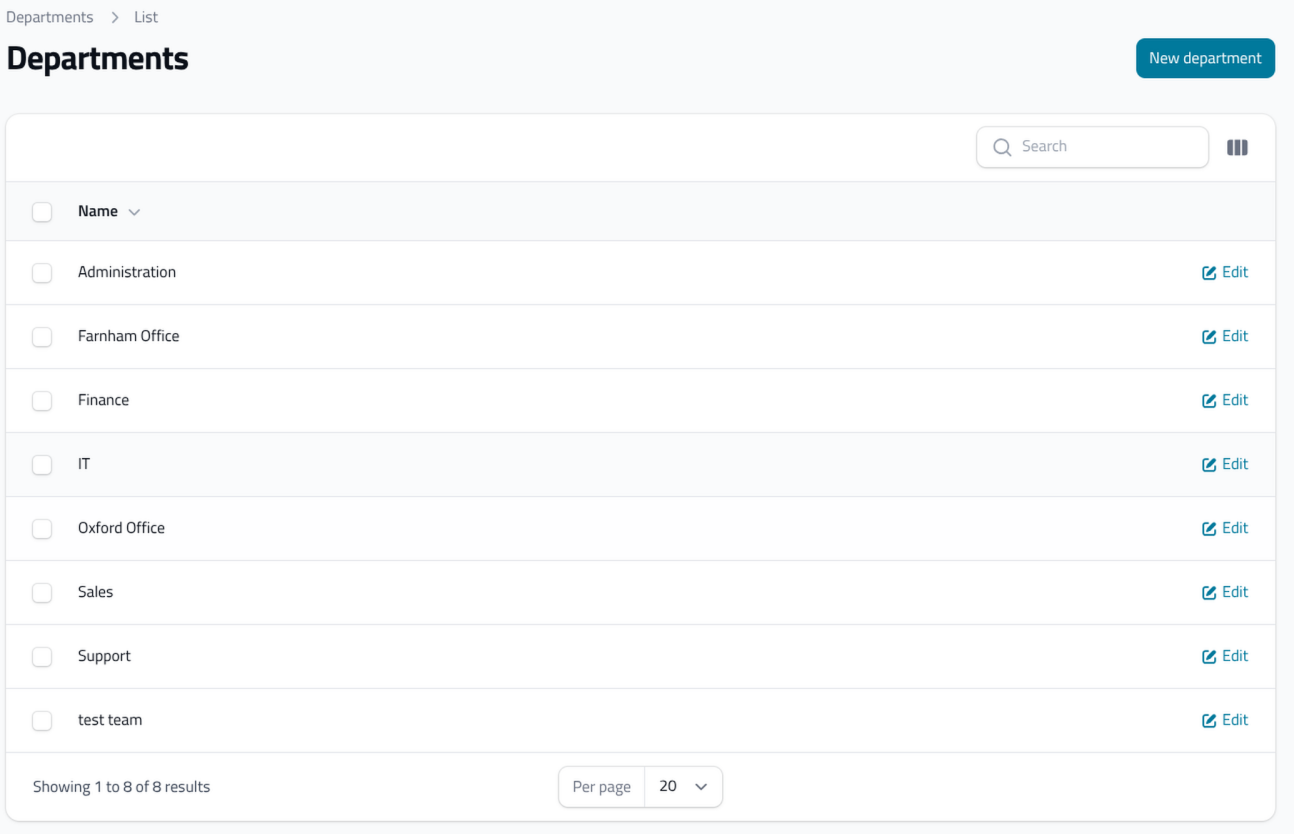
Att skapa och använda avdelningar
Avdelningar används som filter för att söka efter personal i IdencyTime. I de flesta fall importerar vi dem från ert HR-system. Om ni hanterar saker manuellt kan ni skapa så många avdelningar som ni behöver genom att välja Ny avdelning och ge det ett namn. Dessa kan sedan tilldelas personal, redo för filtrering.
Avsnitt 4 | Enhetsgrupper
Vad gör enhetsgrupper?
Enhetsgrupper håller personalen synkroniserad med de rätta enheterna inom ditt företag. Vissa företag behöver bara en enhetsgrupp, vilket innebär att alla kan logga in på alla enheter. Andra vill begränsa vilka som kan logga in på varje enhet, och det är här Device Groups kommer in.
En enhetsgrupp kan kopplas till en enhet, men personal kan kopplas till många enhetsgrupper. Om du vill dela upp personalen genom enhetsgrupper måste du skapa en standardgrupp som alla ska synkronisera in från HR-systemet först.
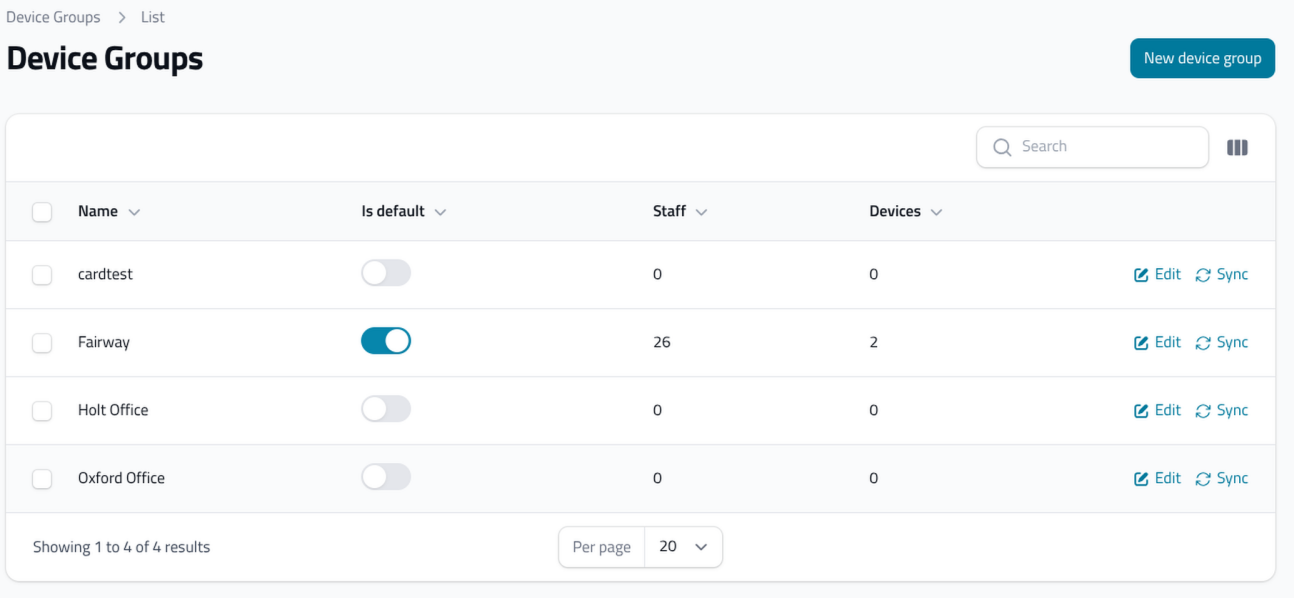
Lägga till personal i en enhetsgrupp
När dina enhetsgrupper har skapats kan du lägga till personal i dem. Gå till personallistan, välj personal i mängd och välj sedan Lägg till/Ta bort enhetgrupp.En enhetsgrupp kan kopplas till en enhet, men personal kan kopplas till många enhetsgrupper. Om du vill dela upp personalen genom enhetsgrupper måste du skapa en standardgrupp som alla ansluter sig till först från HR-systemet.
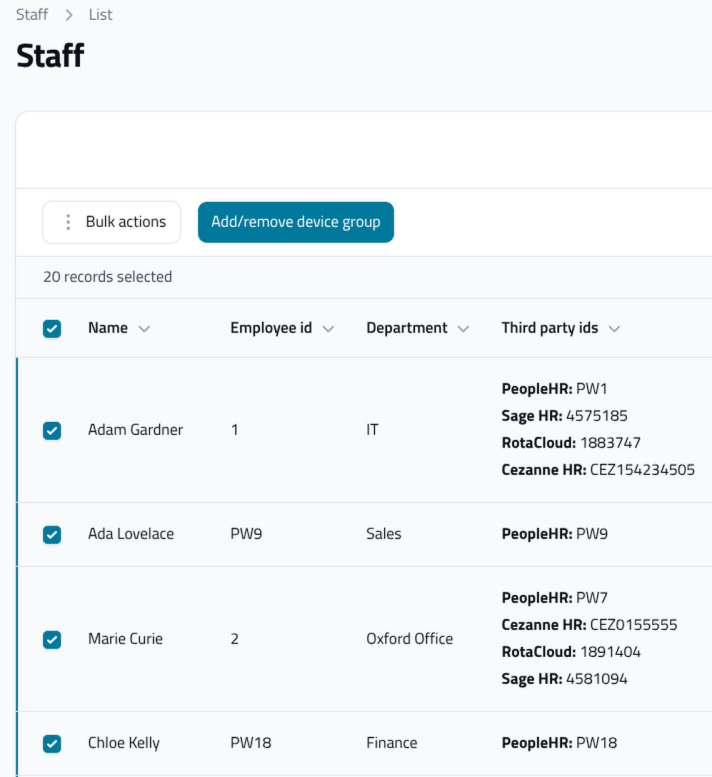
Att välja enhetsgrupp
Välj enhetsgruppen från nedrullningsmenyn och välj sedan Skicka in.
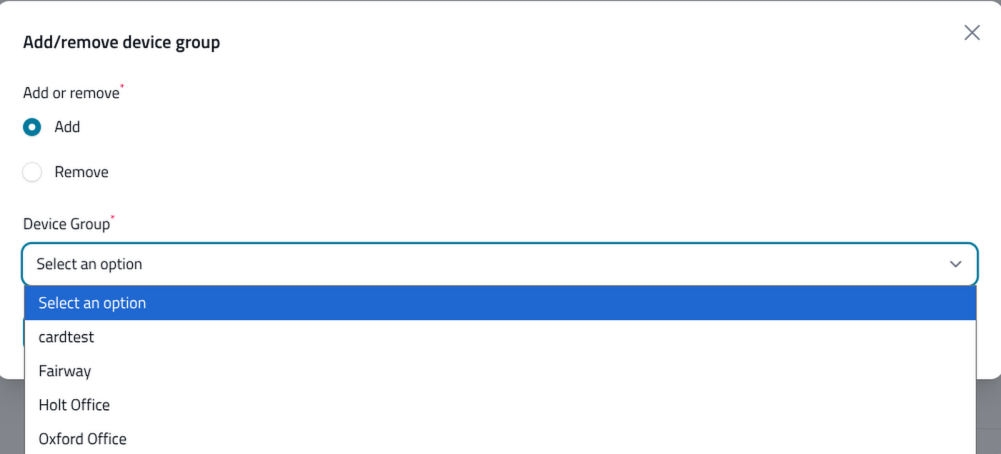
Att lägga till en enhetsgrupp till en enhet
Det sista steget är att lägga till enhetsgruppen på enheten. Navigera till menyalternativet Enheter och välj Redigera På den enhet som du vill lägga till en enhetsgrupp på, hitta gruppen i rullgardinsmenyn och välj Spara ändringar. När du har lagt till dem kommer personalen automatiskt att börja synkronisera dem till enheten, så att du kan lägga till ansikten, fingeravtryck, kort eller stämpelbrickor i deras profiler.
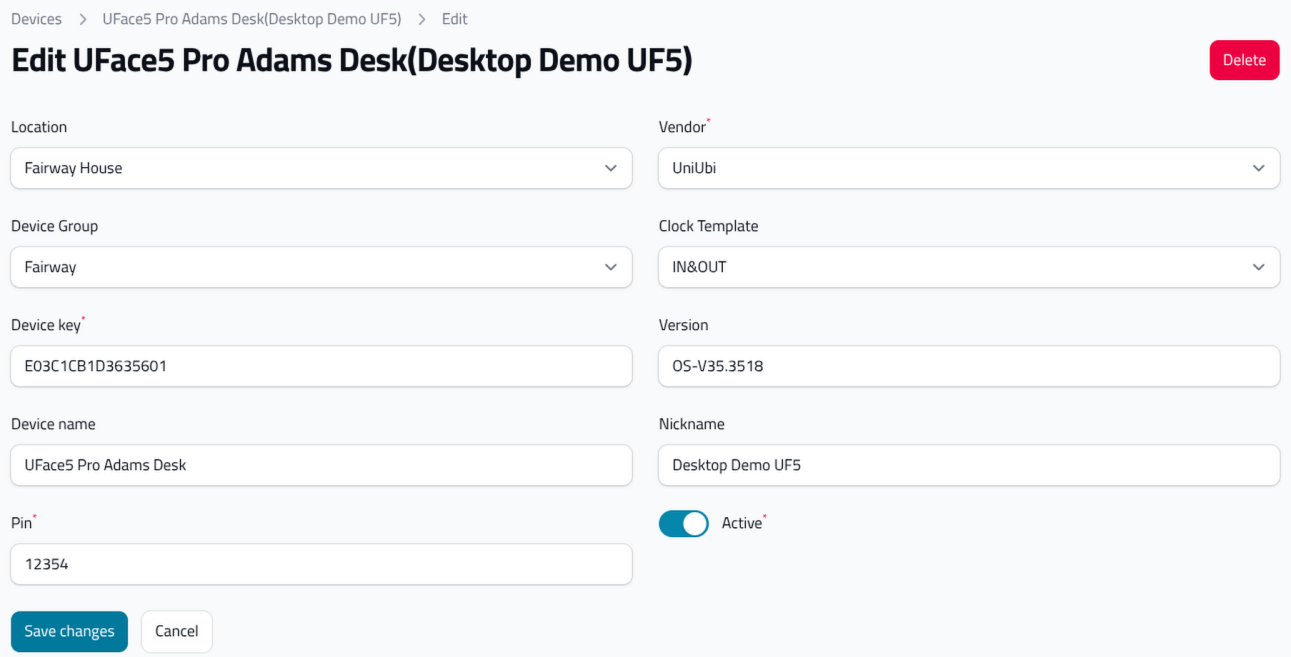
Avsnitt 5 | Platser
Att skapa en plats
Platser används inom IdencyTime för att spåra var en användare har arbetat. En plats kan kopplas till många enheter. För att skapa en väljer du Ny plats och ge det ett namn. Dessa kan sedan läggas till i enheter från menyalternativet Enheter.
Lokationer används också som det primära filteret i evakueringsrapporten. Du kan läsa mer här: Så använder du IdencyTime-räkningen för evakuering
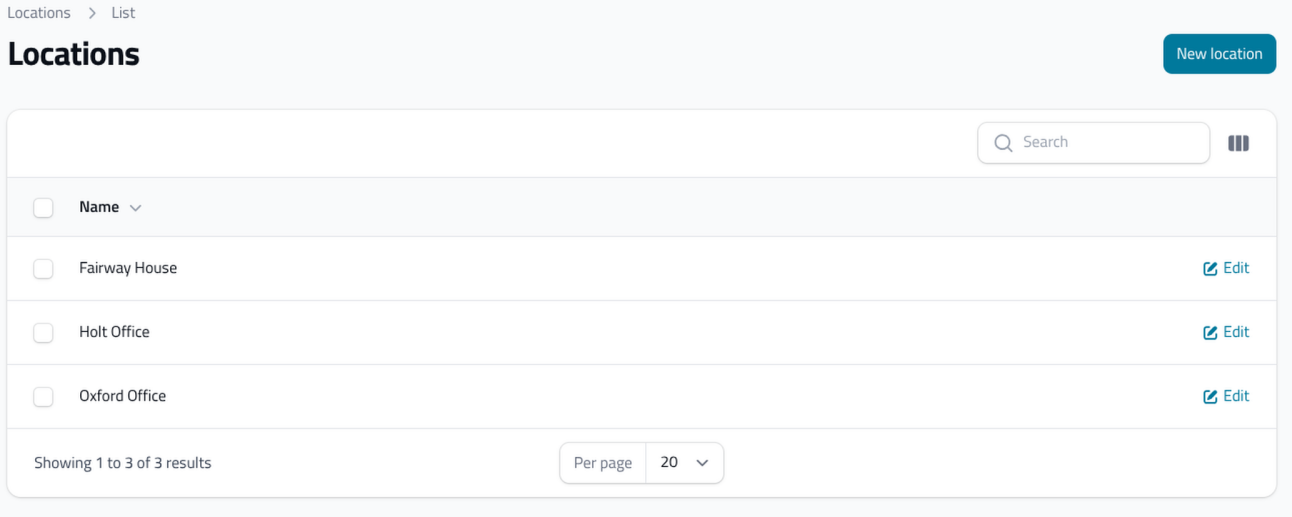
Behöver du hjälp med att hitta i IdencyTime?
Om du har några frågor om instrumentpanelen, enheterna, personalen eller någon annan meny hjälper vår support gärna till.
IdencyTime – API för tid och närvaro samt T&A-integrationer

















 English (UK)
  English
  English (Canada)
  Français du Canada
  Svenska
  Português
  Nederlands
  Italiano
  Français
  Español
  Deutsch