This guide explains how to assign different access levels in Go2Clock and outlines the differences between each level.
Getting Started:
Navigate to the Employees menu in Go2Clock.
Now click View to see the list of your employees.
From the right-hand menu, click Edit next to the employee you would like to give access to.
Employee DashboardUpdate Employee
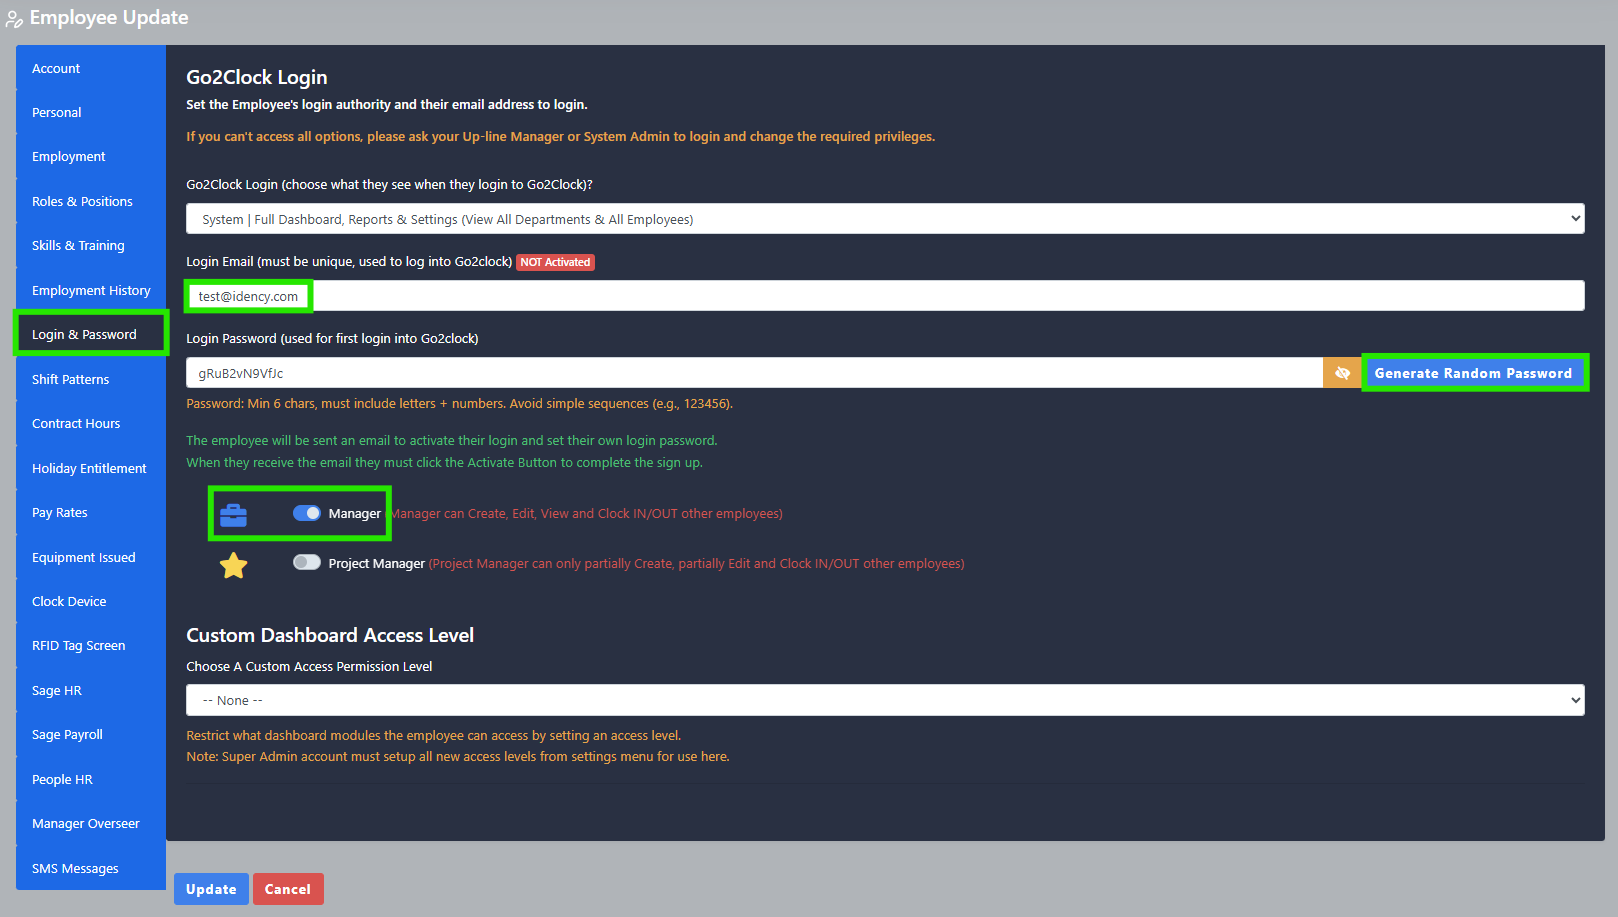
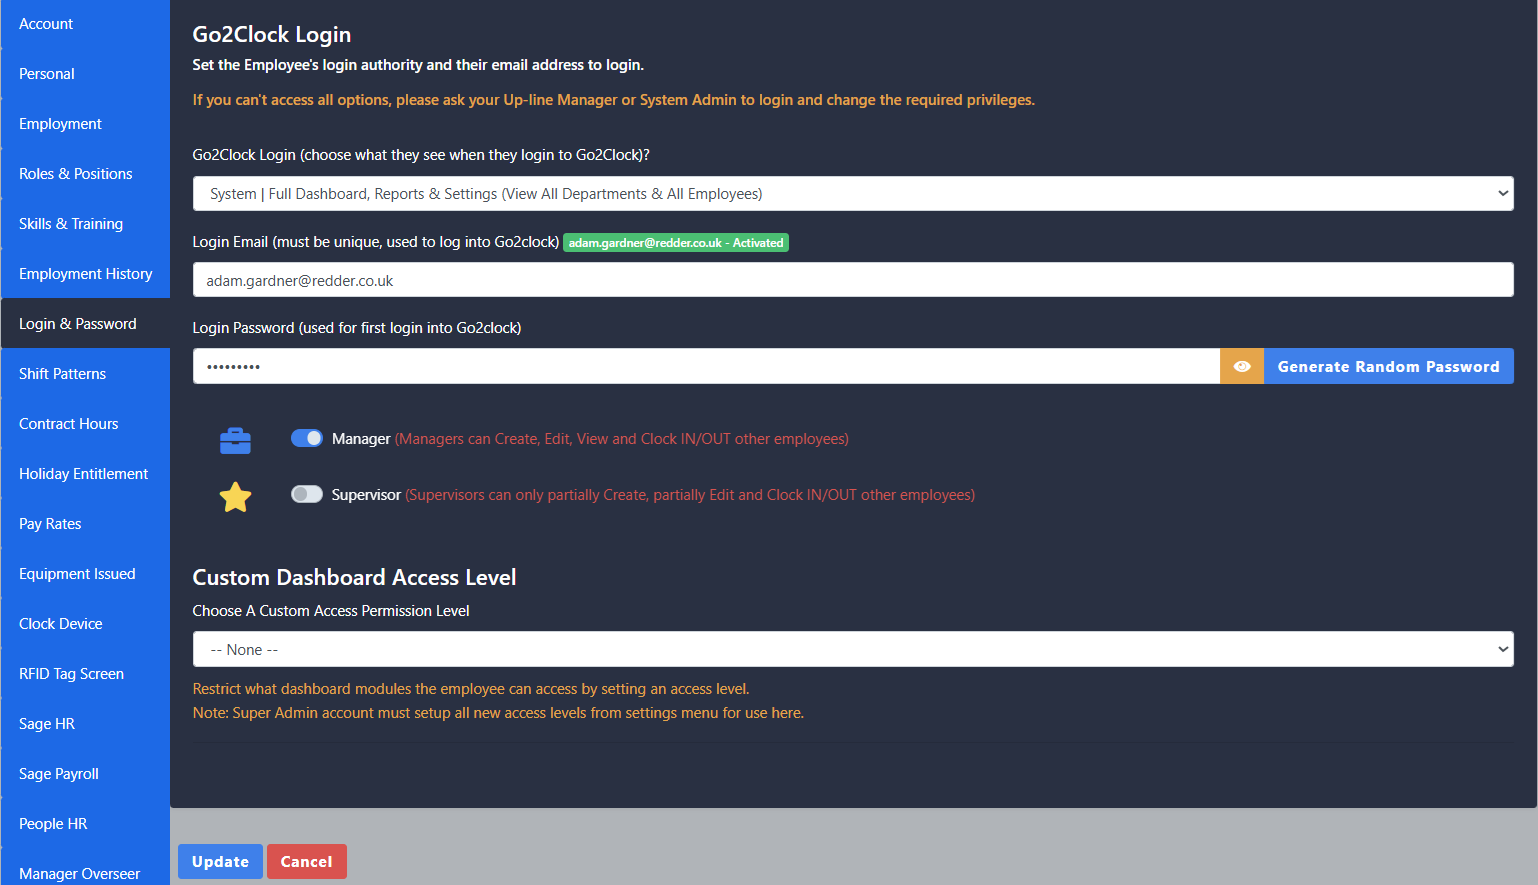
Navigate to the Login & Password menu.
Access levels can be selected using the first dropdown under the Go2Clock Login heading (scroll down to see a description of each access level).
After selecting the desired access level, input the employees email address under Login Email.
Now under Login Password click “Generate a Random Password” which will be emailed to the employee (this can be changed after the first login).
Some access levels will ask if you want to give Manager or Supervisor access as primary options. Each Role can be configured with customised permissions (for more control over the roles, refer to the custom roles permissions [see details below]). Supervisor Switch On gives Read Only access and limited access to the Employees menu, hiding sensitive data.
When you are finished, you can hit the Update button on the employee, and they will be emailed to activate the account.
Access Levels Explained:
System Access Levels
System | Full Dashboard, Reports & Settings
Full functionality of Go2Clock minus some Super Admin-only settings
Can see all Departments and Employees in the system
If they have the Manager Switch enabled they will be able to create, edit and delete anything within the system that they have access to
Ability to give other Users access up to their access level and below
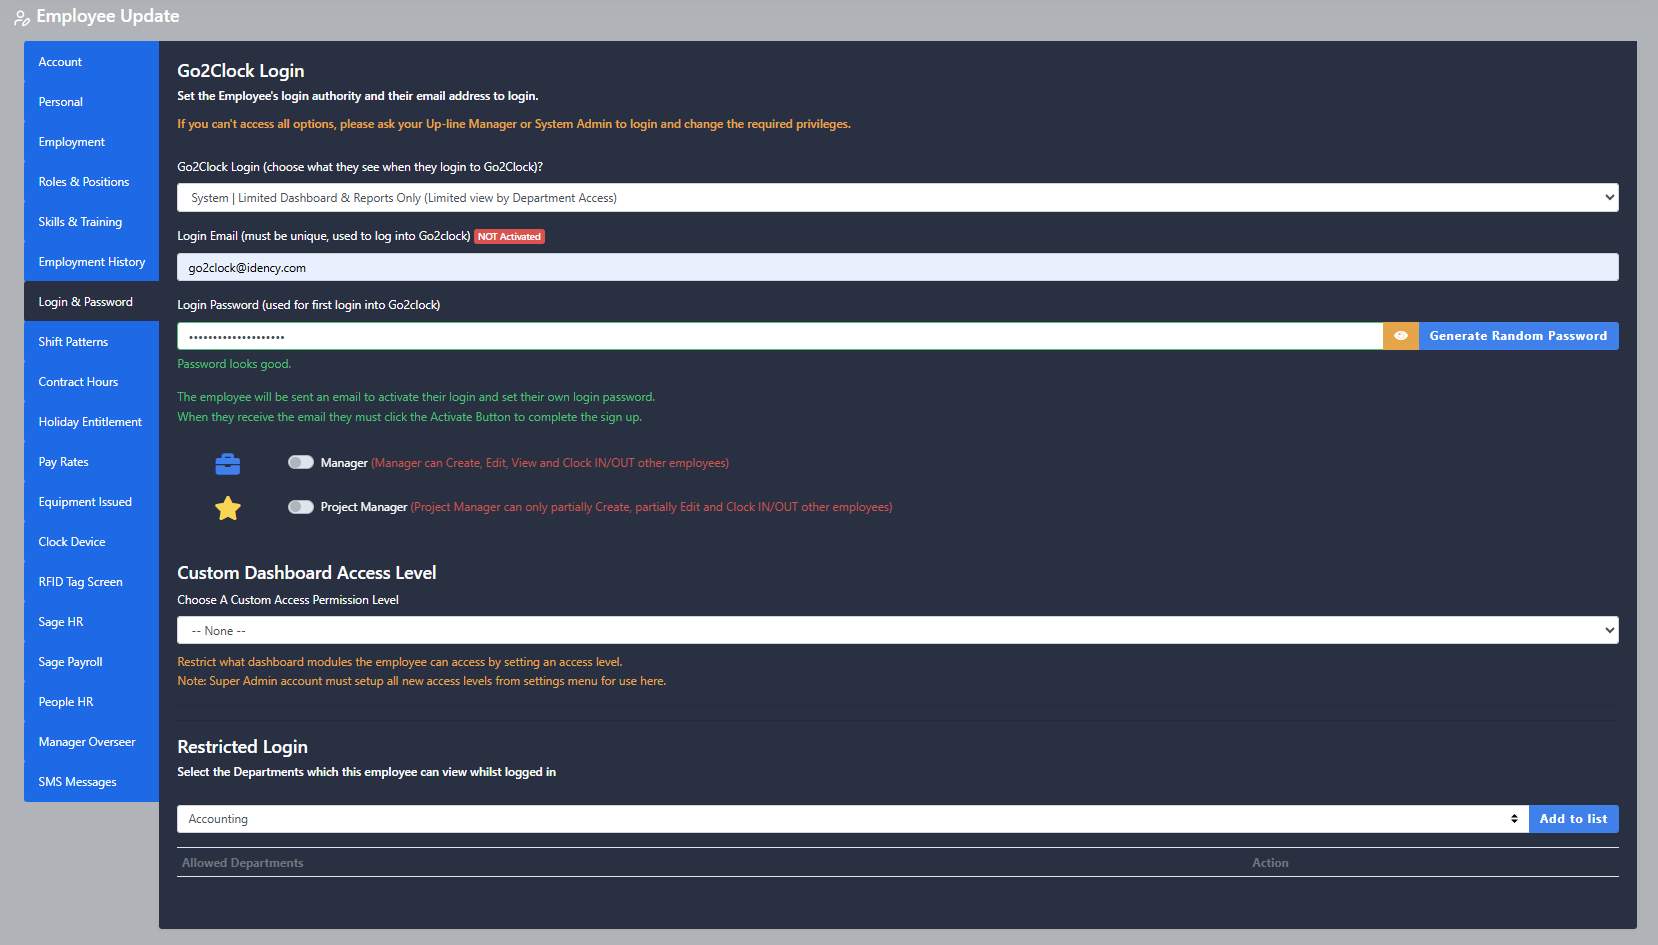
System | Limited Dashboard & Reports Only
Access to assigned Departments and Employees only
Same abilities as System Full Dashboard but only for allowed Departments and Employees
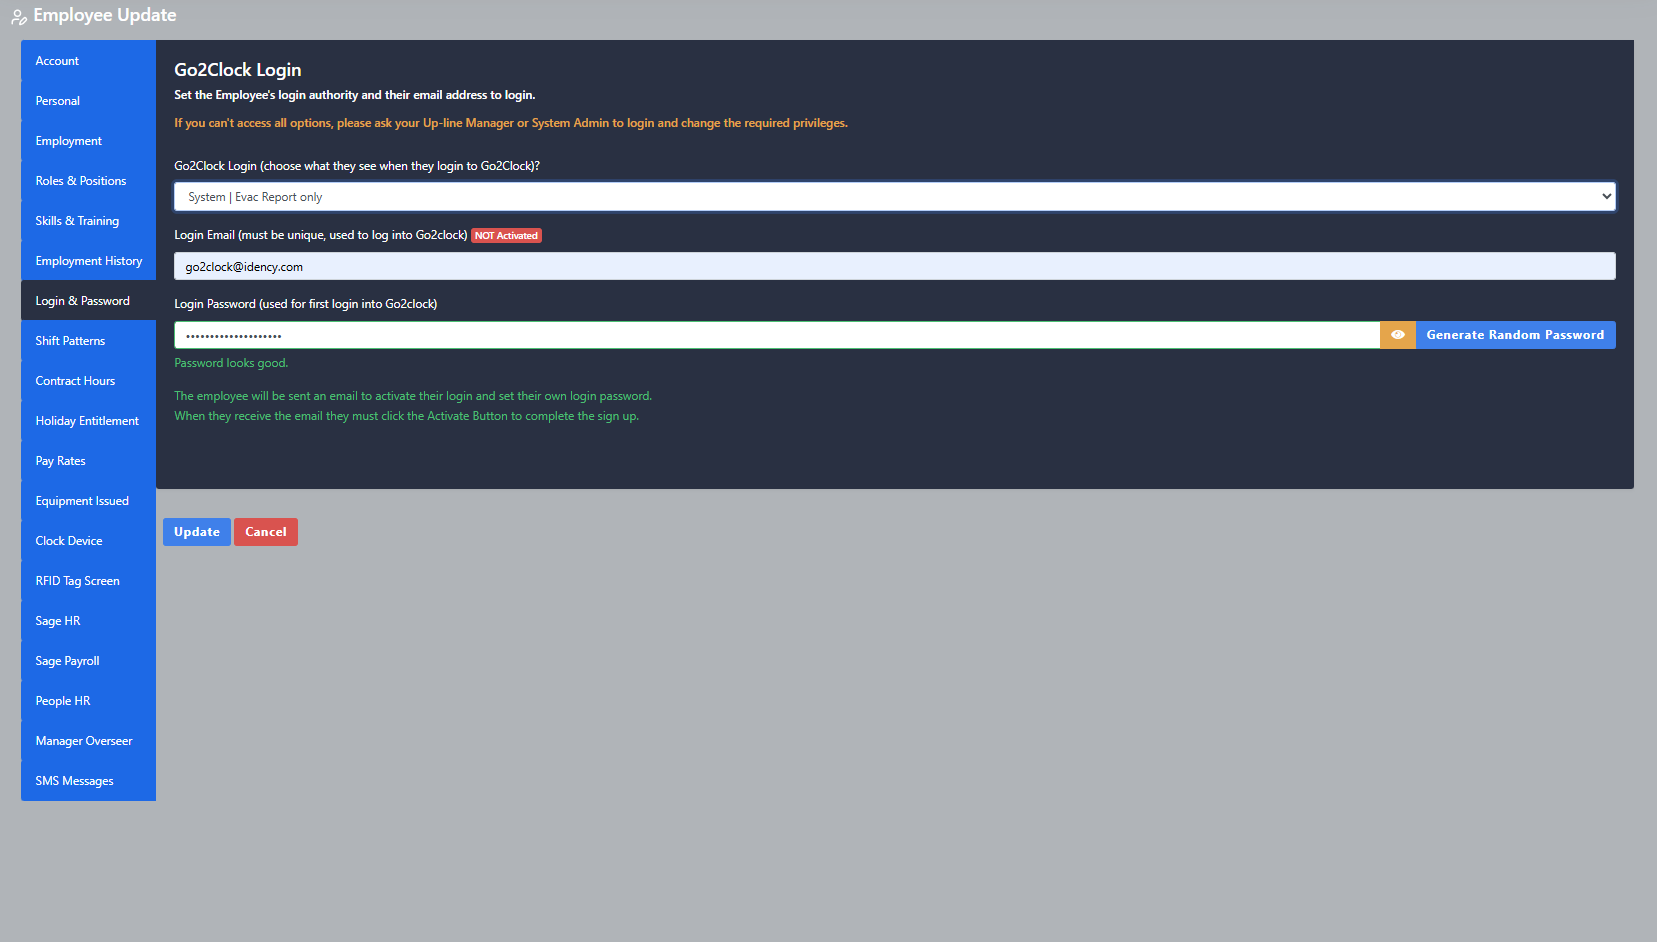
System | Evac Report Only
Access to the Evacuation report only
Essentially Fire Wardens and taken straight to the Evacuation report when logging in
Can create a desktop shortcut on a phone or tablet to access report quickly
Employee Access Levels
Employee | Full Dashboard
(Own Dashboard, Tasks, Mobile Clocking, Report Absence, Leave Requests)
Employees can login to their own User Dashboard
Can see their Weekly Schedule, request Leave or report Absence
Start clock timers for Project Timers they may have assigned
Can clock IN and OUT, showing geolocation at the point of clocking
Must have GSP Enabled on their phones to be able to use this feature
Employee | Limited Dashboard
(Smartphone View of Own Schedule, Tasks, Clock Records, Report Absence, Request Leave etc)
Same abilities as Employee | Full Dashboard, without ability to clock IN and OUT
Employee | View Only Dashboard
(Smartphone View Only of Own Schedule, Clock Records)
Same abilities as Employee | Limited Dashboard, but the Employee can only view their schedule and clock records
Employee | Clocking Only
(Smartphone Mobile Clocking IN/OUT only)
Only ability is to mobile/remote clock with geolocation
Must have GSP Enabled on their phones to be able to use this feature
Automatically logged out once clock is made
System | Full Dashboard, Reports & SettingsSystem | Limited Dashboard & Reports OnlySystem | Evac Report Only
Custom Access Levels:
Custom Dashboard Access Levels
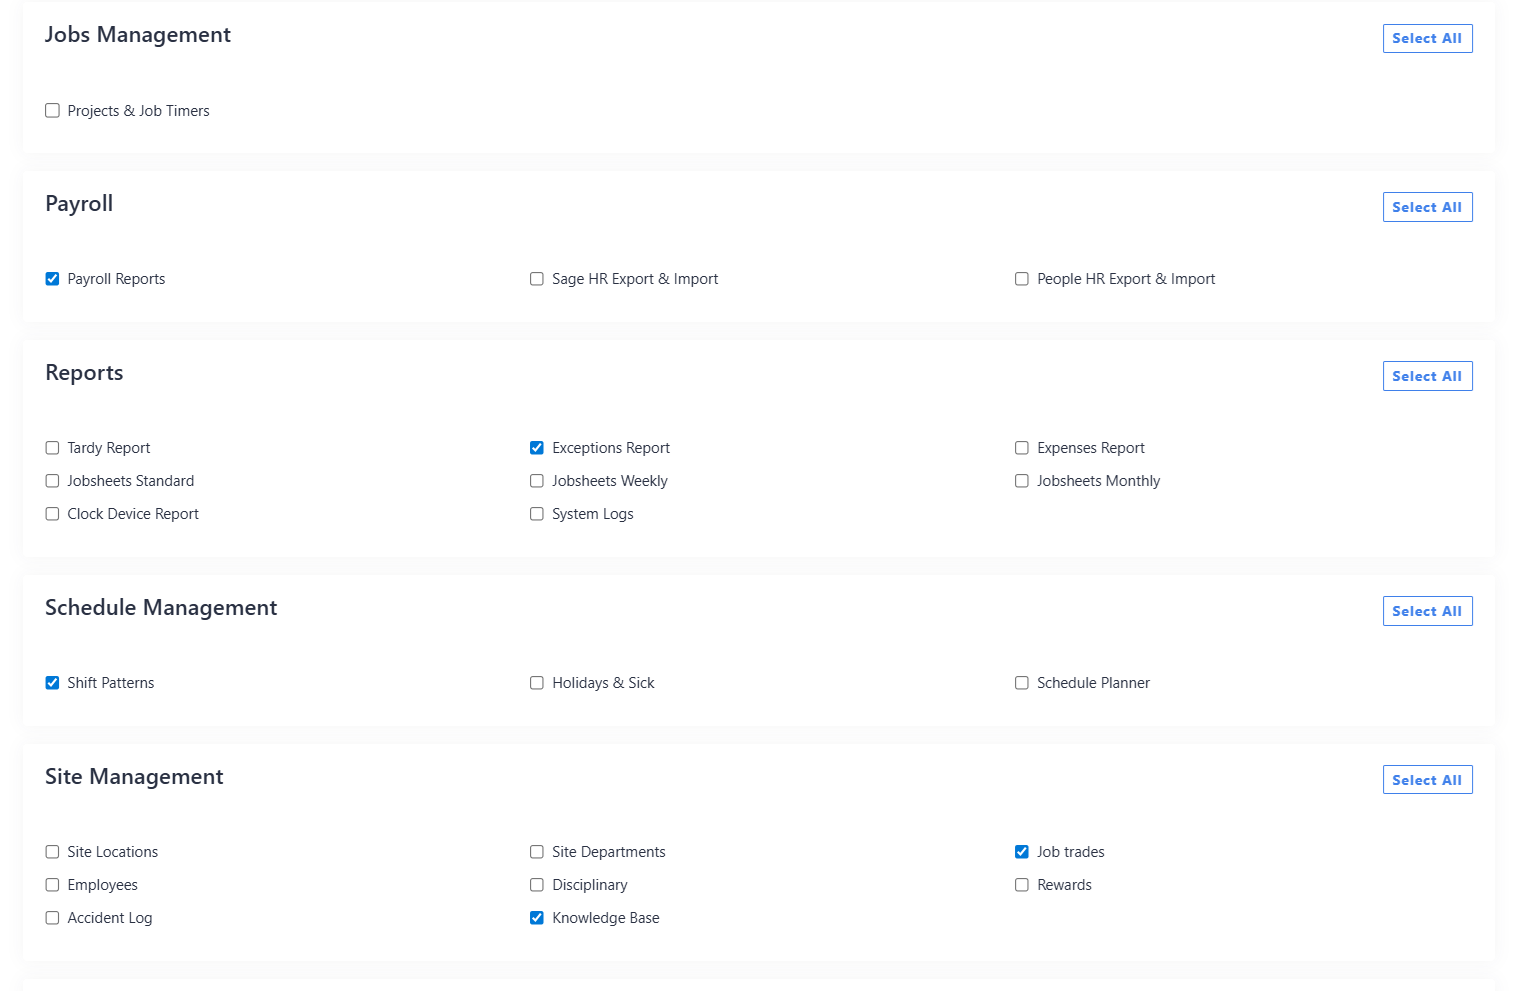
This essentially allows you to choose which side navigation menu’s can and cannot be accessed within the system, only being able to be created by the Super Admin account in System Settings → Access Levels Permissions.
In here you create a new Access Level Permission by selecting what menu’s you would like accessible or hidden, for all the menus within Go2Clock, see sample image for example.
You can then assign this from the drop-down menu under the Custom Dashboard Access levels.
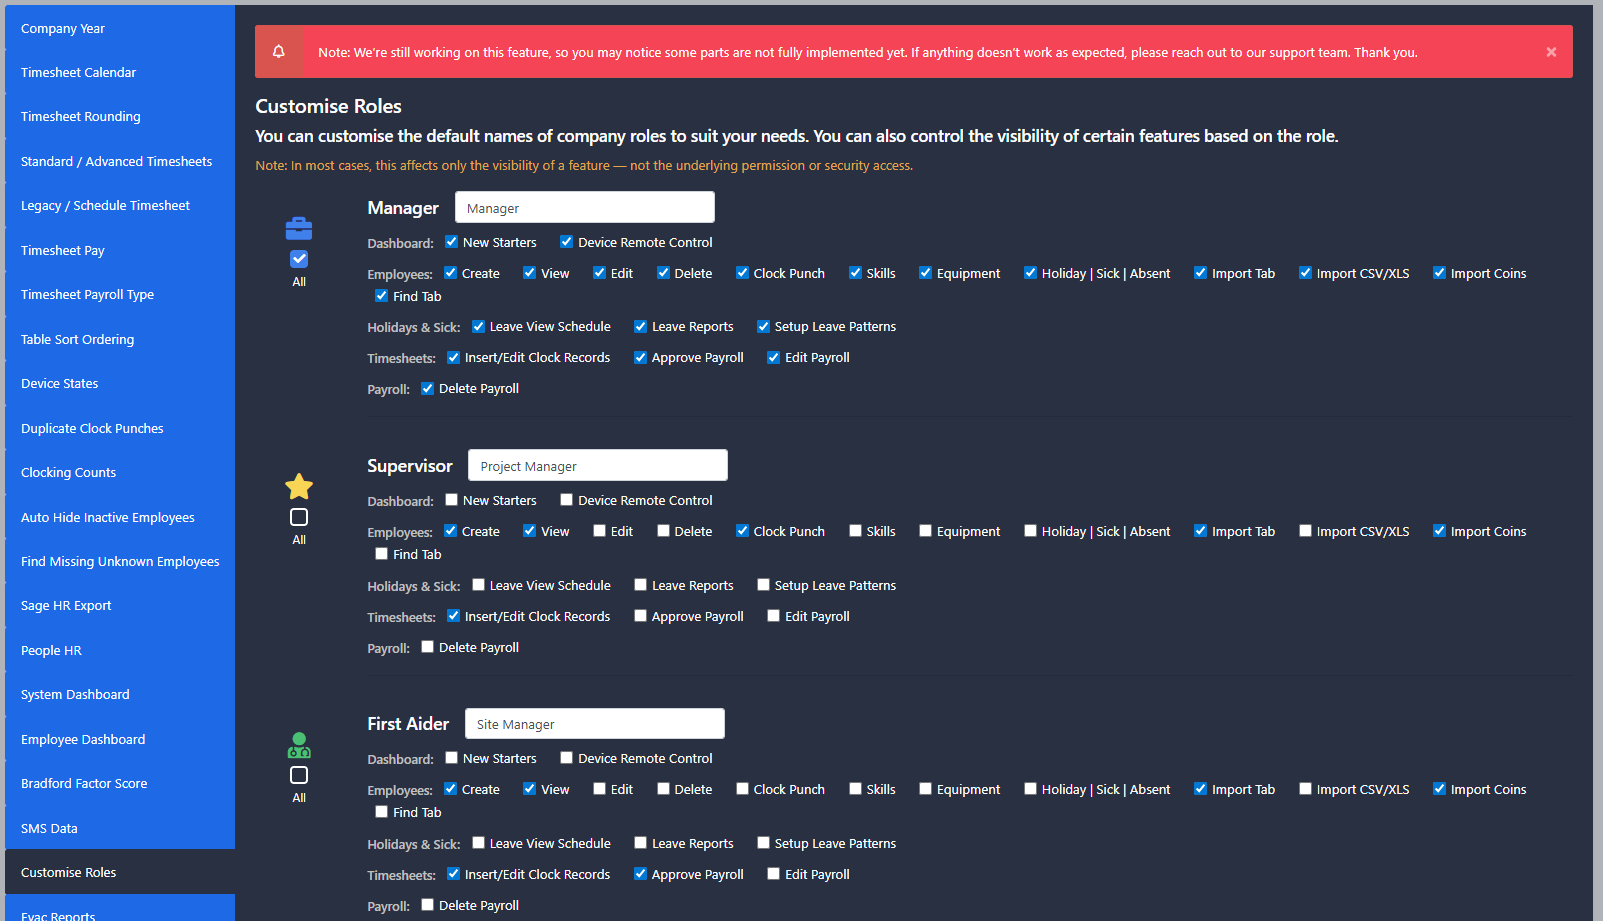
Custom Roles Permissions
This allows you to specifically control what data the different roles can add, edit and delete throughout the system, which can only be changed by the Super Admin account in System Settings → System Config Settings → Customise Roles.
In the customise roles you can break down which features you want particular job roles to have access to within Go2Clock, see sample image for example.
You can assign this in the Roles & Positions menu or alternatively the Login & Passwords menu when editing an employee.
Custom Access Level PermissionsCustom Role Permissions
In good company: some of Idency's clients
We've detected you might be speaking a different language. Do you want to change to: