In deze handleiding wordt uitgelegd hoe u verschillende toegangsniveaus kunt toewijzen in Go2Clock en wat de verschillen zijn tussen de verschillende niveaus.
Aan de slag:
Navigeer naar de Werknemers menu in Go2Clock.
Klik nu op Bekijk om de lijst van je werknemers te zien.
Klik in het menu aan de rechterkant op Bewerk naast de medewerker aan wie je toegang wilt geven.
WerknemersdashboardWerknemer bijwerken
Navigeer naar de Inloggen & Wachtwoord menu.
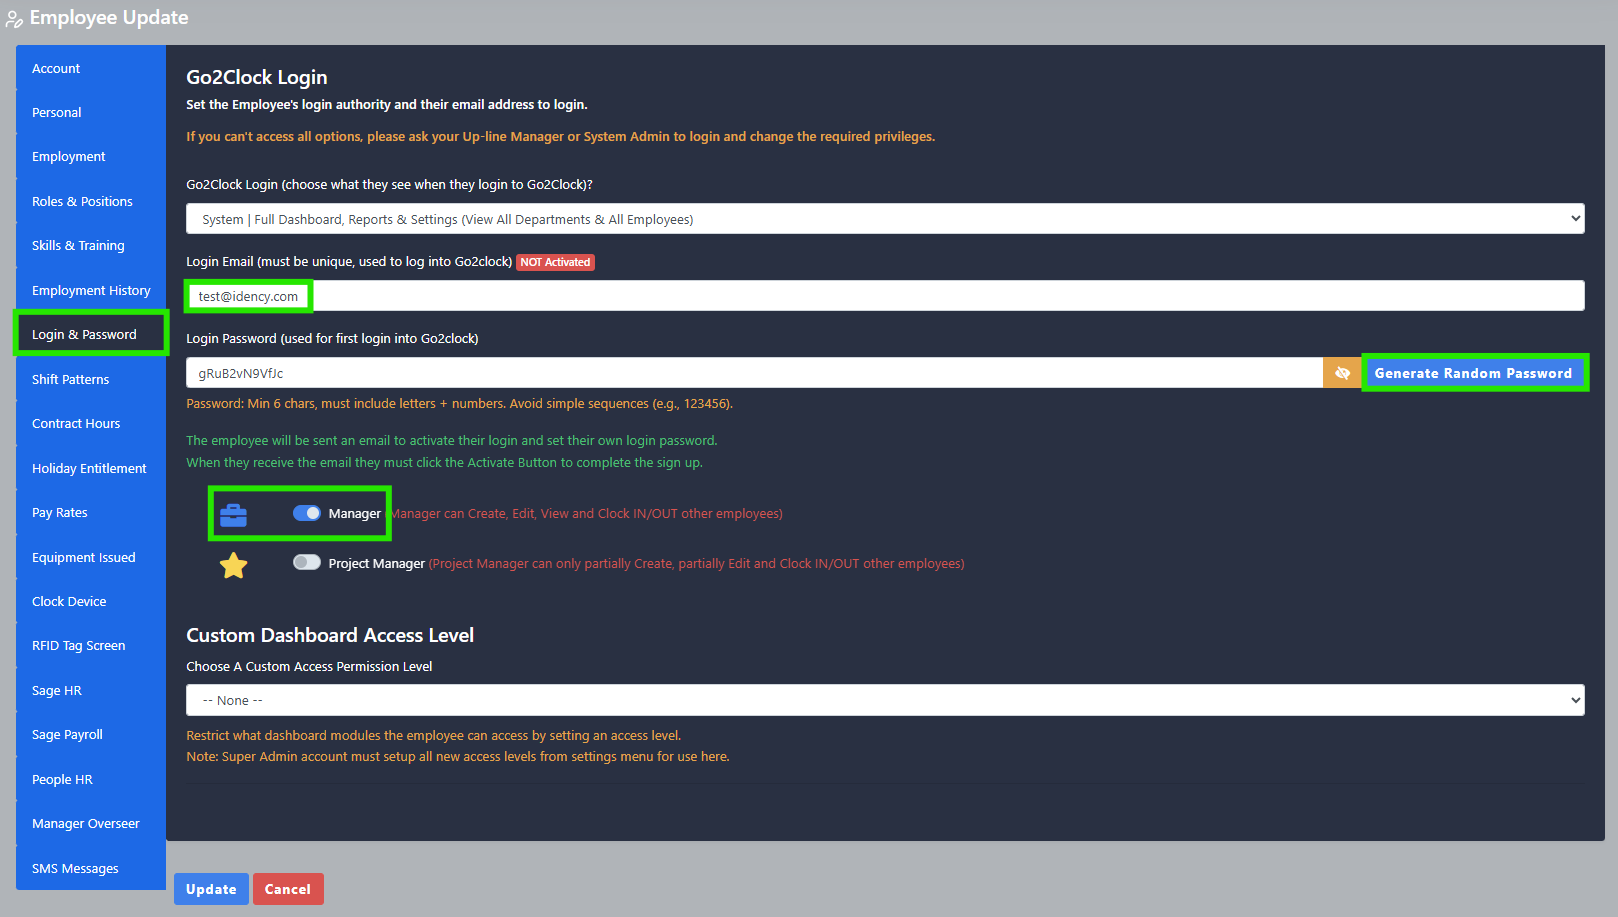
Toegangsniveaus kunnen worden geselecteerd met de eerste dropdown onder de Go2Clock Aanmelden rubriek (scroll naar beneden voor een beschrijving van elk toegangsniveau).
Nadat u het gewenste toegangsniveau hebt geselecteerd, voert u het e-mailadres van de werknemer in onder Inloggen Email.
Klik nu onder Login Password op “.“Een willekeurig wachtwoord genereren” die naar de werknemer wordt gemaild (dit kan worden gewijzigd na de eerste aanmelding).
Sommige toegangsniveaus vragen of je het volgende wilt geven Manager of supervisor toegang als primaire opties. Elke rol kan worden geconfigureerd met aangepaste rechten (raadpleeg voor meer controle over de rollen de aangepaste rollen machtigingen [zie details hieronder]). Supervisor-schakelaar Op geeft Alleen lezen toegang en beperkte toegang tot de Werknemers menu, waardoor gevoelige gegevens verborgen blijven.
Als je klaar bent, kun je op de Update knop op de medewerker, en ze zullen een e-mail ontvangen om de account te activeren.
Toegangsniveaus uitgelegd:
Niveaus voor systeemtoegang
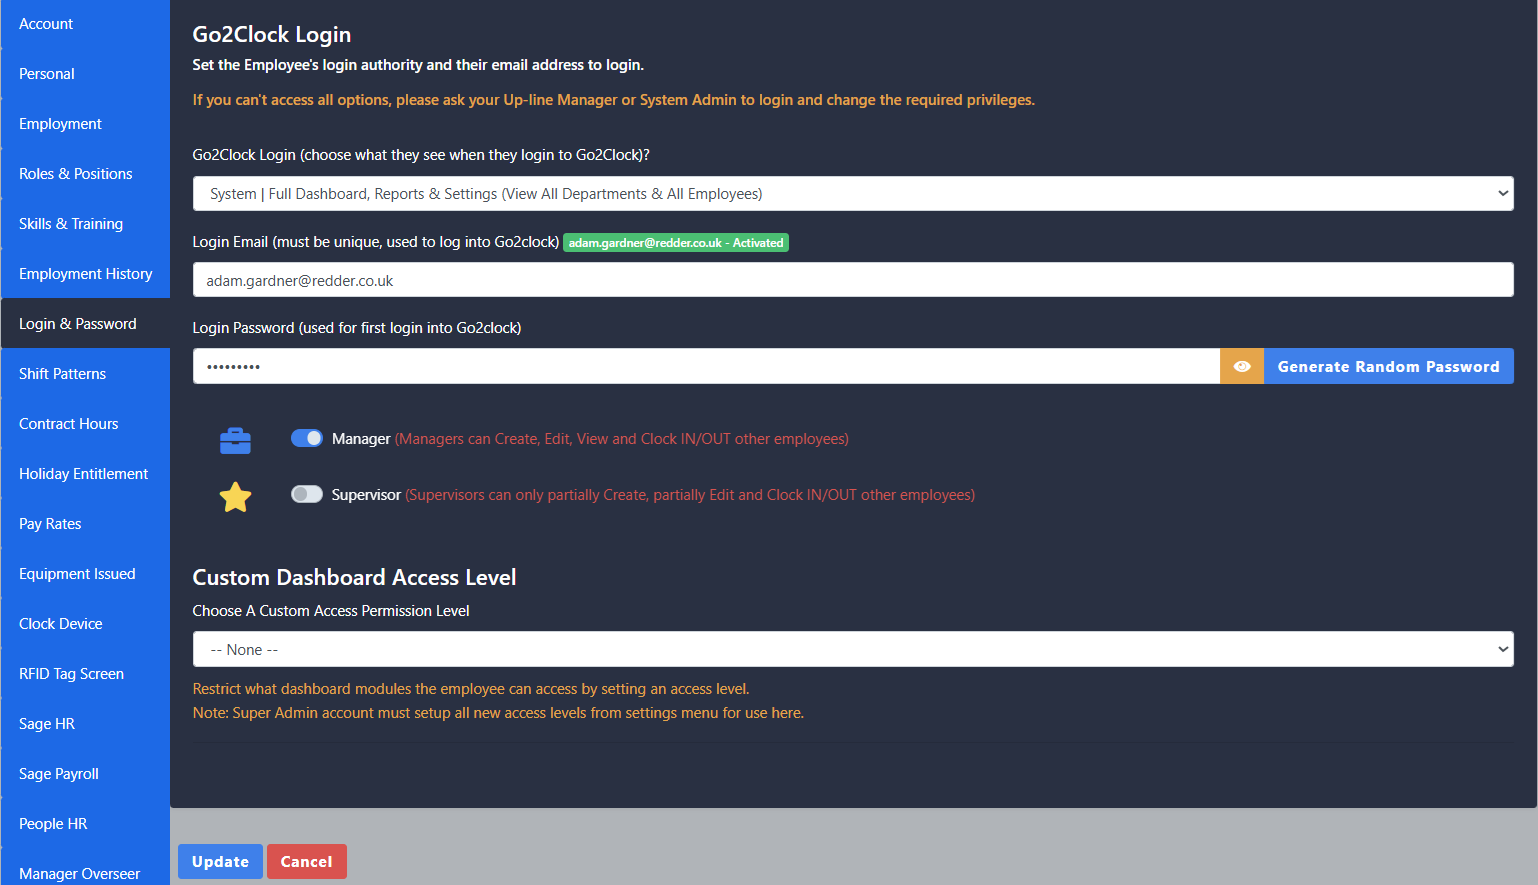
Systeem | Volledig dashboard, rapporten en instellingen
Volledige functionaliteit van Go2Clock minus enkele Superbeheerder-alleen instellingen
Kan alles zien Afdelingen en Werknemers in het systeem
Als ze de Manager Schakelaar ingeschakeld kunnen ze alles in het systeem waartoe ze toegang hebben, maken, bewerken en verwijderen
Mogelijkheid om andere gebruikers toegang te geven tot hun toegangsniveau en lager
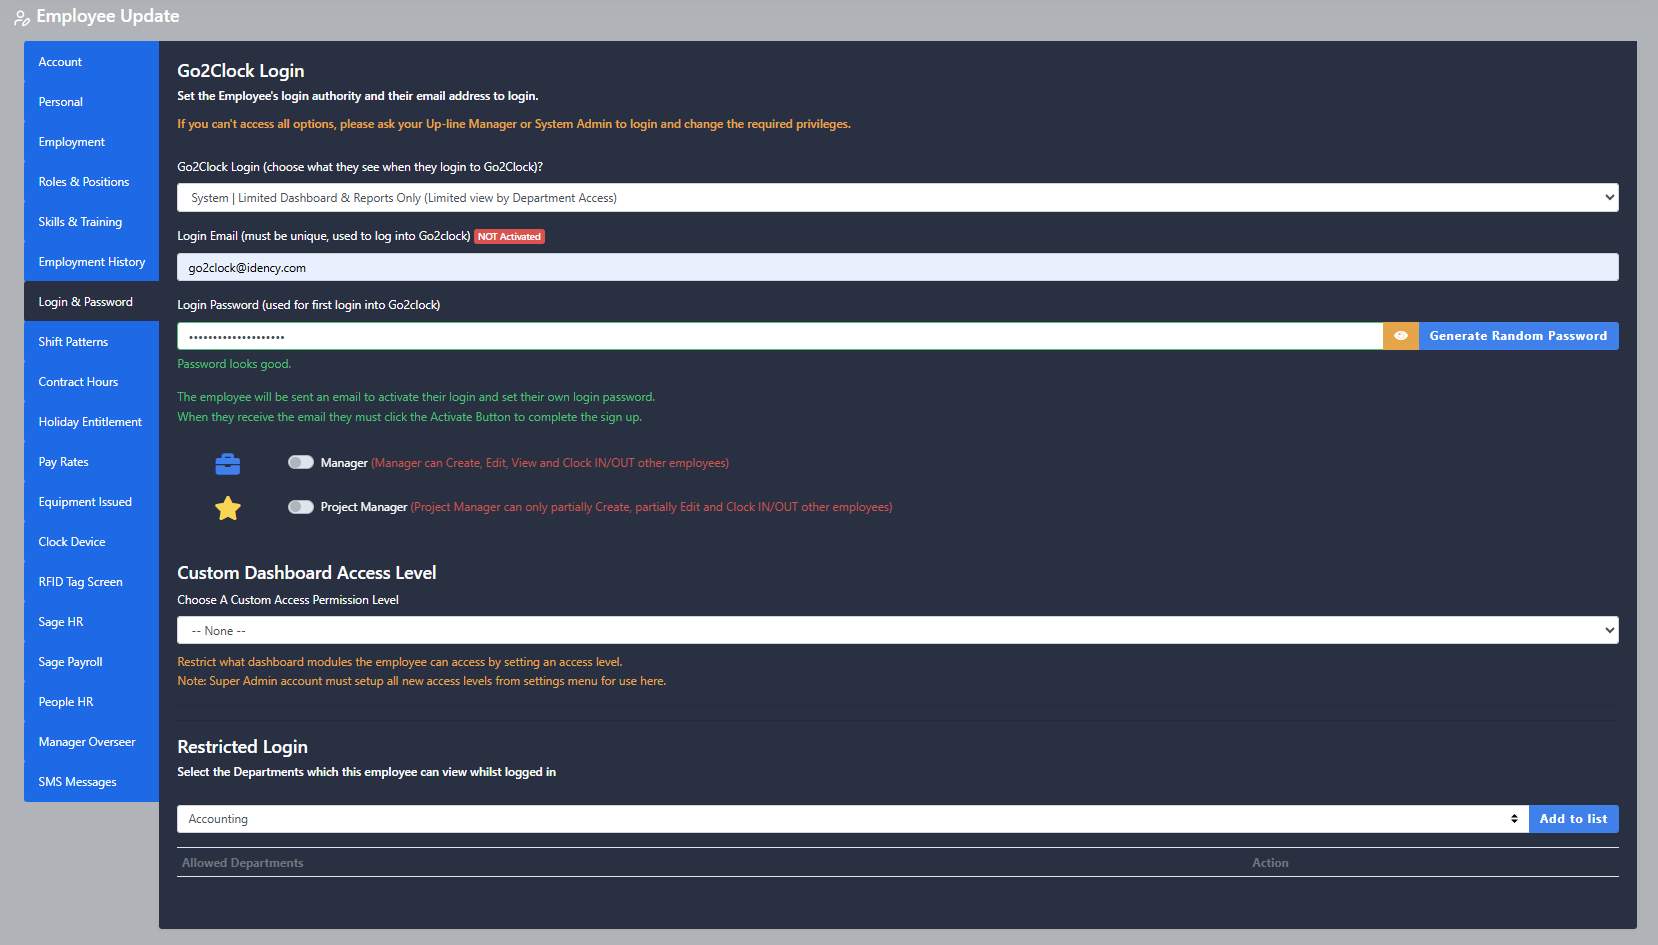
Alleen Dashboard en rapporten beperkt
Toegang tot toegewezen Afdelingen en Werknemers alleen
Dezelfde vaardigheden als Systeem Volledig dashboard maar alleen voor toegestane Afdelingen en Werknemers
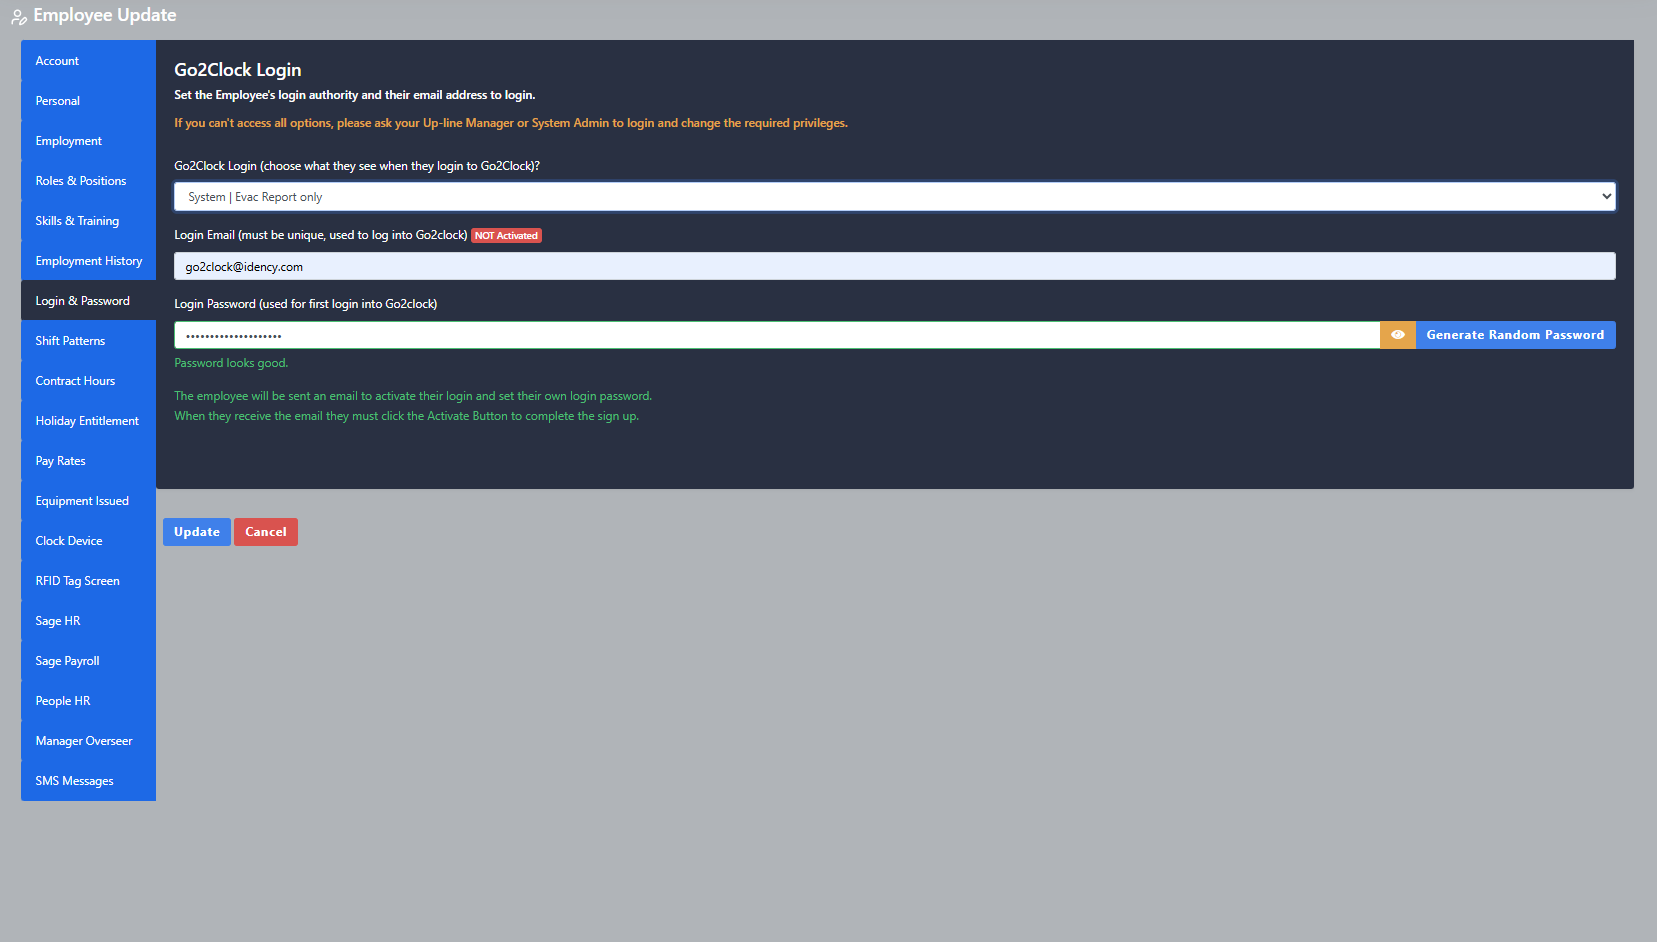
Alleen evacuatierapport
Toegang tot de Evacuatie alleen verslag
In wezen Brandwachten en rechtstreeks naar de Evacuatie melding bij inloggen
Kan een snelkoppeling op het bureaublad maken op een telefoon of tablet om het rapport snel te openen
Werknemers kunnen inloggen op hun eigen Gebruikersdashboard
Kan hun Wekelijks Plannen, aanvragen Verlaat of rapporteren Afwezigheid
Start klok timers voor Projecttimers ze kunnen hebben toegewezen
Kan klok IN en UIT, die de geolocatie op het klokpunt toont
Moet hebben GSP ingeschakeld op hun telefoon om deze functie te kunnen gebruiken
Werknemer Beperkt Dashboard
(Smartphone weergave van eigen rooster, taken, klokrecords, afwezigheid melden, verlof aanvragen enz.)
Dezelfde vaardigheden als Werknemer | Volledig dashboard, zonder vermogen om te klokken IN en UIT
Alleen werknemer bekijken Dashboard
(Alleen smartphoneweergave van eigen rooster, klokrecords)
Dezelfde vaardigheden als Werknemer Beperkt Dashboard, maar de werknemer kan alleen bekijk hun rooster en klokrecords
Alleen werknemer klokken
(alleen mobiele klok IN/OUT van smartphone)
De enige mogelijkheid is om mobiel/afstandsbediening klok met geolocatie
Moet hebben GSP ingeschakeld op hun telefoon om deze functie te kunnen gebruiken
Automatisch uitgelogd zodra de klok is gemaakt
Systeem | Volledig dashboard, rapporten en instellingenAlleen Dashboard en rapporten beperktAlleen evacuatierapport
Aangepaste toegangsniveaus:
Aangepaste toegangsniveaus voor dashboards
Hiermee kun je kiezen welke zijnavigatiemenu's wel en niet toegankelijk zijn in het systeem, en alleen kunnen worden gemaakt door de Superbeheerder account in Systeeminstellingen → Toegangsniveaus Machtigingen.
Hier maak je een nieuwe Toegangsniveau Toestemming door te selecteren welke menu's u toegankelijk of verborgen wilt hebben, voor alle menu's binnen Go2Clock, zie voorbeeldafbeelding.
U kunt dit vervolgens toewijzen in het vervolgkeuzemenu onder de Aangepaste Dashboard-toegangsniveaus.
Aangepaste rollen Machtigingen
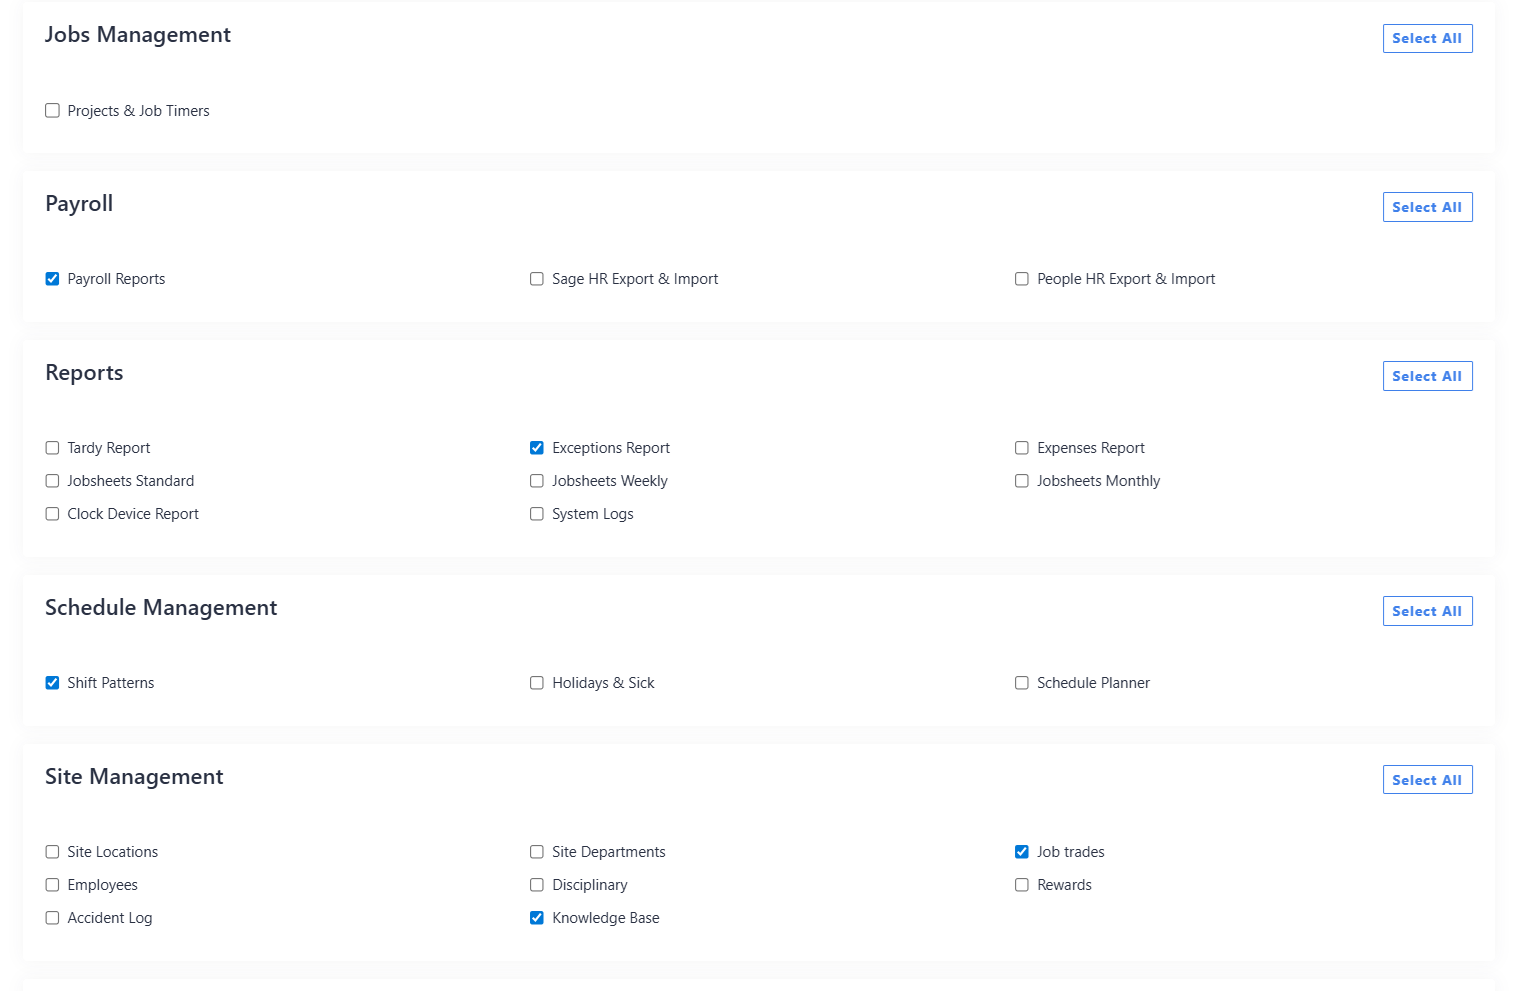
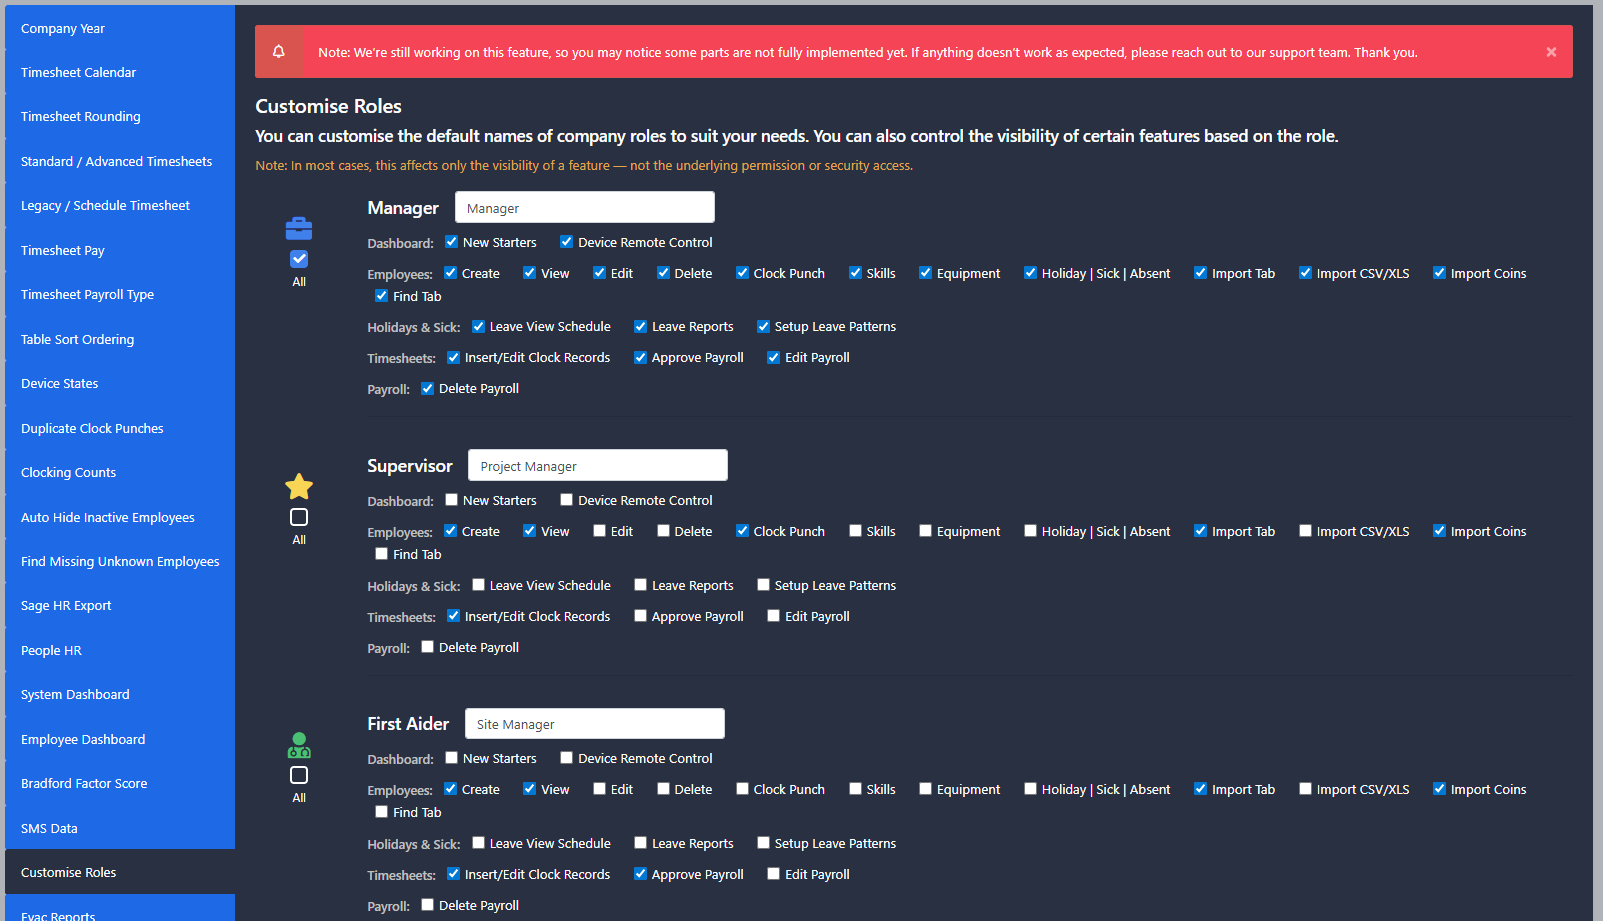
Hierdoor kun je specifiek bepalen welke gegevens de verschillende rollen kunnen toevoegen, bewerken en verwijderen in het systeem, wat alleen kan worden gewijzigd door de Superbeheerder account in Systeeminstellingen → Instellingen systeemconfiguratie → Rollen aanpassen.
In de rollen aanpassen U kunt uitsplitsen tot welke functies in Go2Clock bepaalde functierollen toegang moeten hebben, zie de voorbeeldafbeelding.
U kunt dit toewijzen in de Rollen en functies menu of als alternatief het Inloggen en wachtwoorden menu wanneer u een werknemer bewerkt.
Aangepaste machtigingen op toegangsniveauAangepaste rolrechten
In goed gezelschap: enkele klanten van Idency
We've detected you might be speaking a different language. Do you want to change to: