



































ClockReportsXE Evacuation Reports: Print & Web Server
Please note: To use the ClockReportsXE Evacuation reports feature you must own ClockReportsXE Ultimate. This feature is not available with ClockReportsXE Basic.
ClockReports Evacuation Reports: Printing
In the event of an emergency that requires evacuation, ClockReportsXE can provide a live report of of those present in the building. Below outlines the method of printing an evacuation report:
- This software should already be running (as administrator) at all times on either a dedicated PC or server
- In the case of an emergency, the dedicated supervisor will need to access this software
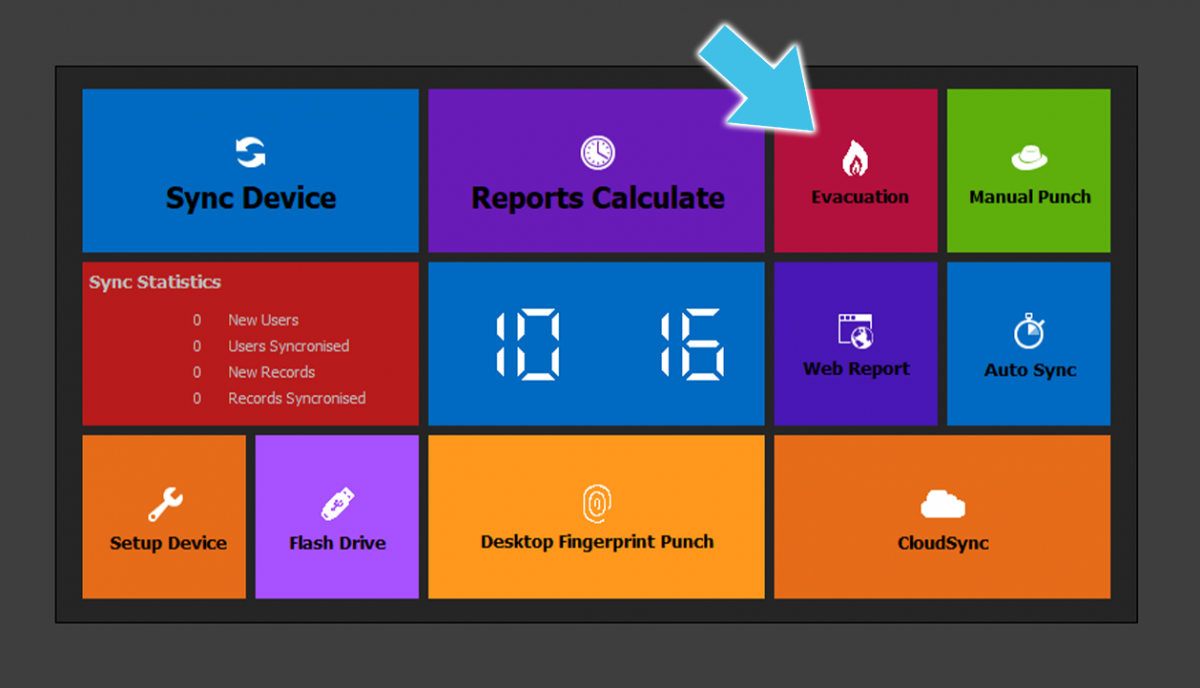
- The ClockReports dashboard displays an ‘Evacuation’ button (see image)
- Click the ‘Evacuation’ button to start generating the evacuation report
- The software will synchronise with the terminal(s) to gather all clock records on the terminal(s)
- This is to ensure the report will display the most up-to-date records
- TIP: Clear all records from the terminal(s) to reduce synchronisation time. Do this periodically to maintain speed, but only after synchronising with software
- Once the synchronisation is completed, an ‘Evacuation List’ will automatically open within the software. There will be a pop up window giving the option to print
- Click ‘OK’ and the report will print to the connected printer
- The dedicated supervisor will then be able to take this printed report to the premises evacuation meet point to check attendance
ClockReports Evacuation Reports: Web server viewing
In the event of an emergency that requires evacuation, ClockReportsXE can provide a live report of of those present in the building. Below outlines the method of printing an evacuation report:
- This software should already be running (as administrator) at all times on either a dedicated PC or server
- In the case of an emergency, the dedicated supervisor will need to access this software
- TIP: Install ClockReportsXE on a dedicated Windows Tablet for mobile use. You may need an additional software licence key for this
- The ClockReports dashboard displays an ‘Evacuation’ button (see image)
- Click the ‘Evacuation’ button to start generating the evacuation report
- The software will synchronise with the terminal(s) to gather all clock records on the terminal(s)
- This is to ensure the report will display the most up-to-date records
- TIP: Clear all records from the terminal(s) to reduce synchronisation time. Do this periodically to maintain speed, but only after synchronising with software
- Once the report has been generated you can access the Evacuation report via a browser
- The device needs to be connected to the same network (by cable or wifi) as the PC/server running the software
- To access the report you put the following into the browser address bar – IP address of the PC server running the software with :7377 on the end. For example: if the PC/Server running the software is on 192.168.1.201 then you’d put this into the address bar: 192.168.1.201:7377
For more information and general guidance on our products & services, please contact us.
Require further support?
Search all Knowledgebase articles
Send a Support Request to The Idency Support Team

















 English (UK)
  English
  English (Canada)
  Français du Canada
  Svenska
  Português
  Nederlands
  Italiano
  Français
  Español
  Deutsch