


































Understanding the PeopleHR Leave Import in Go2Clock
Before using the PeopleHR Holiday Import, ensure that the PeopleHR API connection has been set up in Go2Clock and employees are linked to their PeopleHR ID. If the API connection has not yet been configured, please refer to this knowledge base article: How to Connect PeopleHR to Go2Clock
Section 1 | Employee Link to PeopleHR
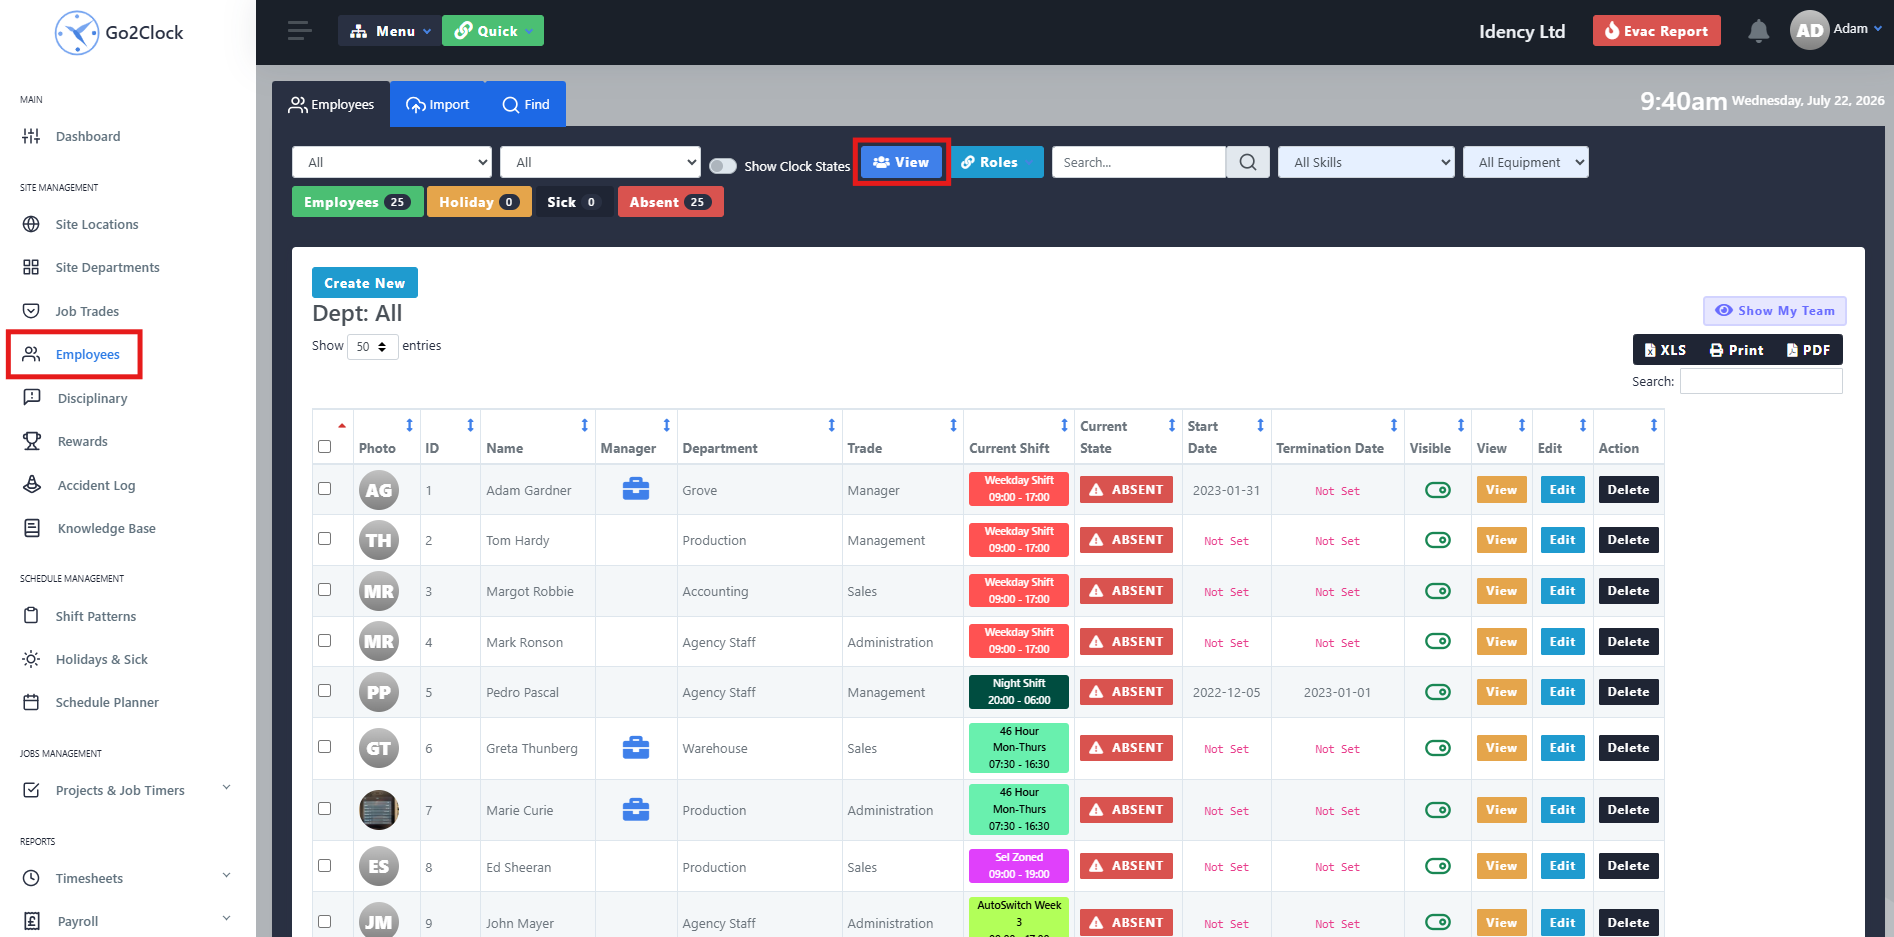
Navigate to the Employee Dashboard and select View. Find the employee you want to check and select Edit.
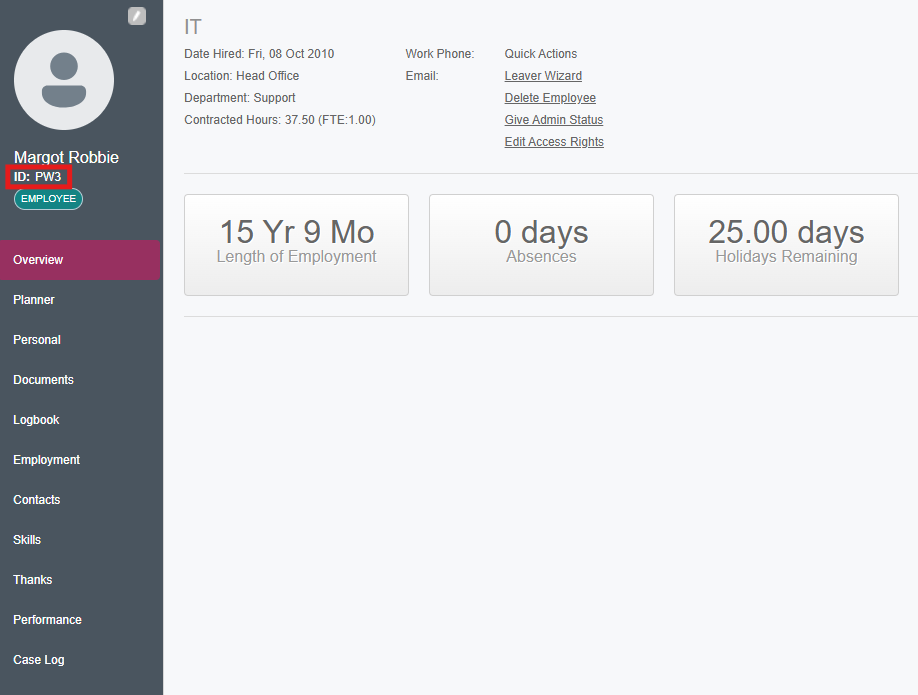
Step 2: Check the PeopleHR Employee ID
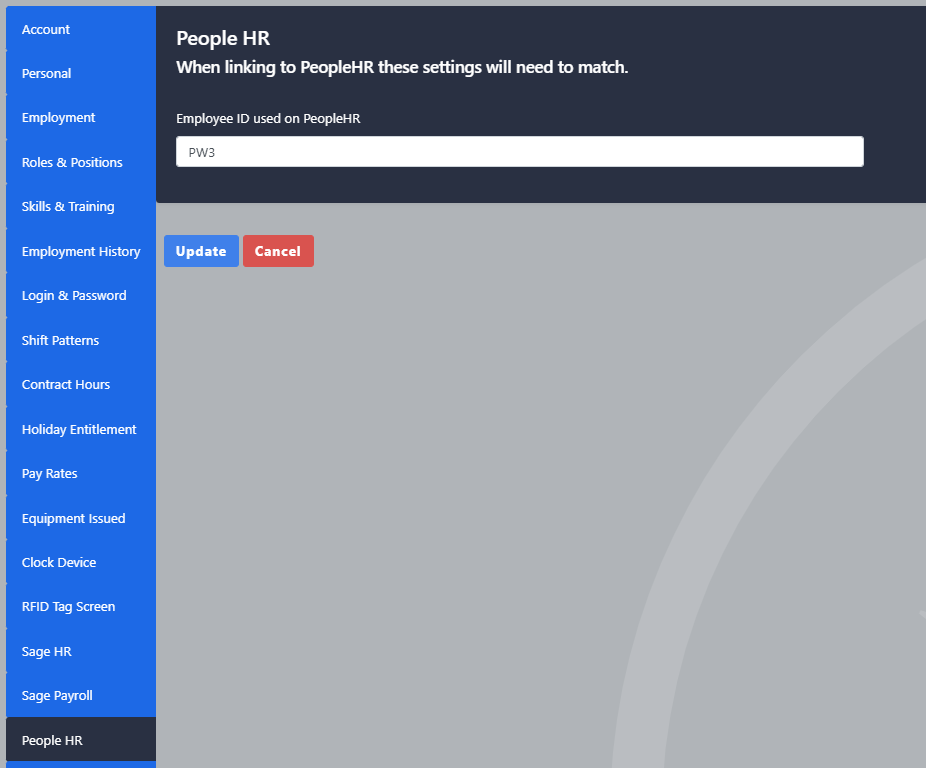
In the employee options navigate to the PeopleHR tab. Ensure the PeopleHR Employee ID field contains the correct ID from PeopleHR. If the field is blank, enter the correct Employee ID and update the employee.
Section 2 | Importing Leave into Go2Clock
Step 1: Import Leave from PeopleHR
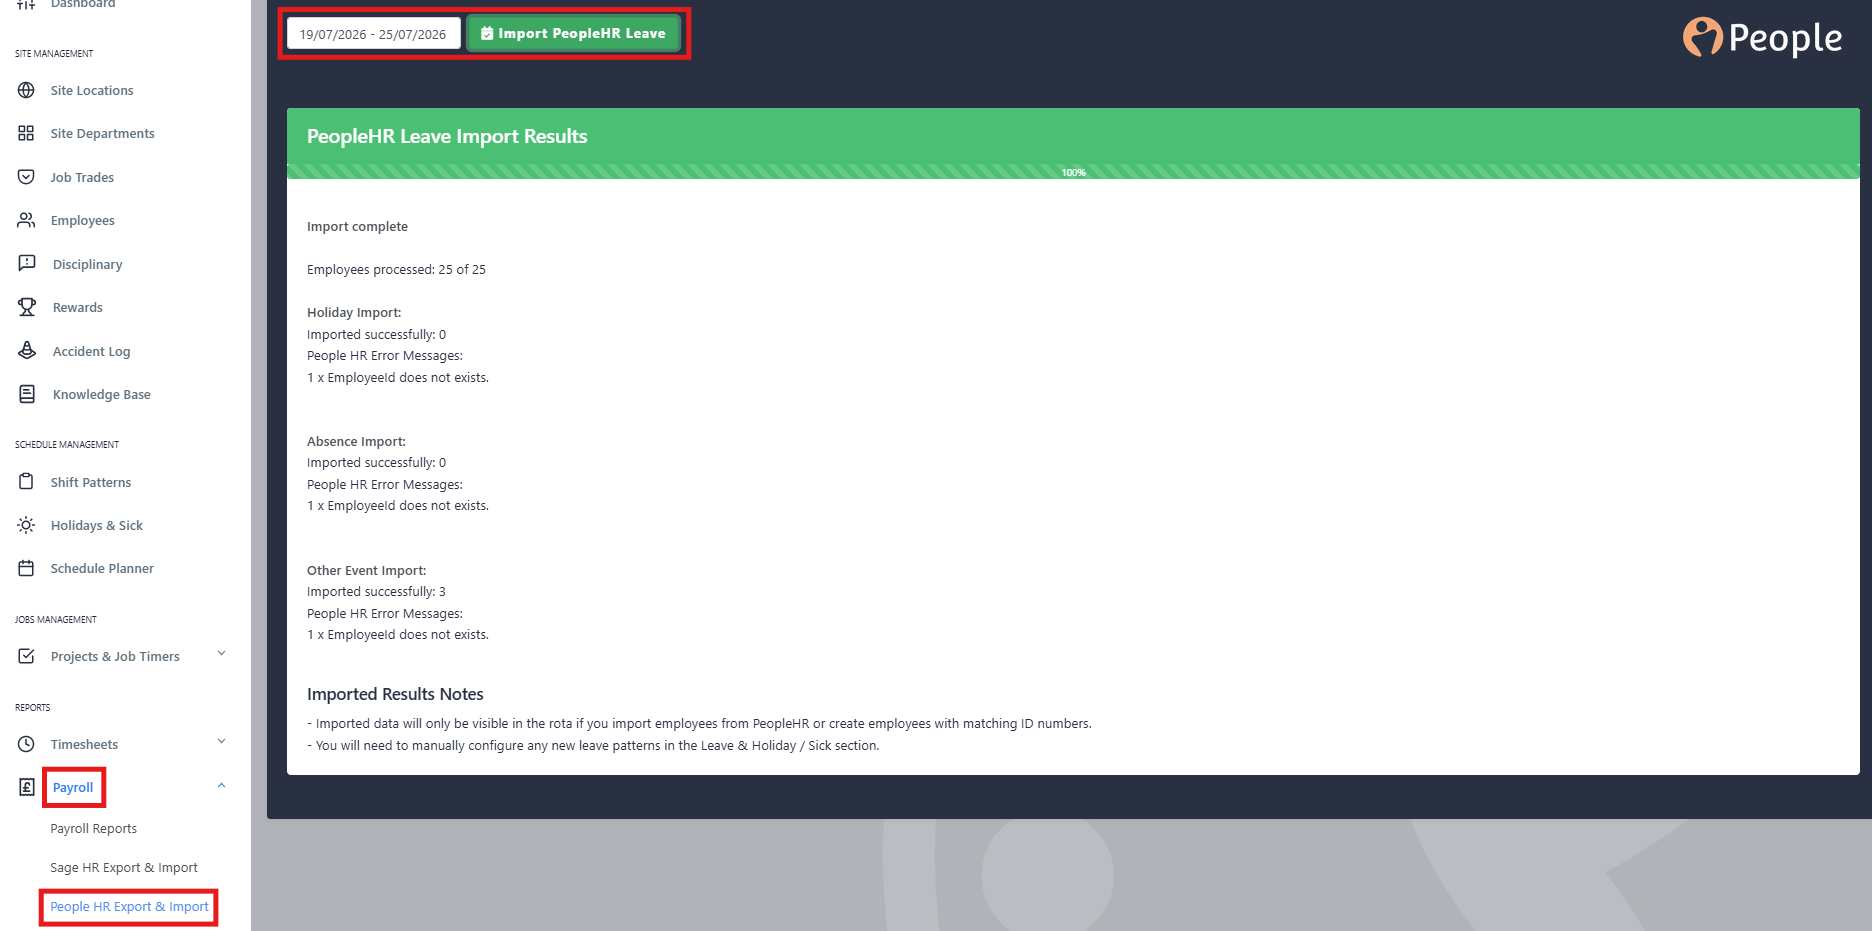
Navigate to Payroll and select PeopleHR Import & Export. At the top of the page select PeopleHR Import Leave. Select the date range you want to pull leave from. Please note that leave can only be imported one month at a time. Once selected, click Import PeopleHR Leave. A progress bar will show the import status.
Once complete you will see the number of successfully imported leave records and a list of skipped holidays that were not yet approved. Any new leave types that have not previously been imported into Go2Clock will need to be corrected.
Step 2: Review the Import Results
Once complete you will see the number of successfully imported leave records and a list of skipped holidays that were not yet approved. Any new leave types that have not previously been imported into Go2Clock will need to be corrected.
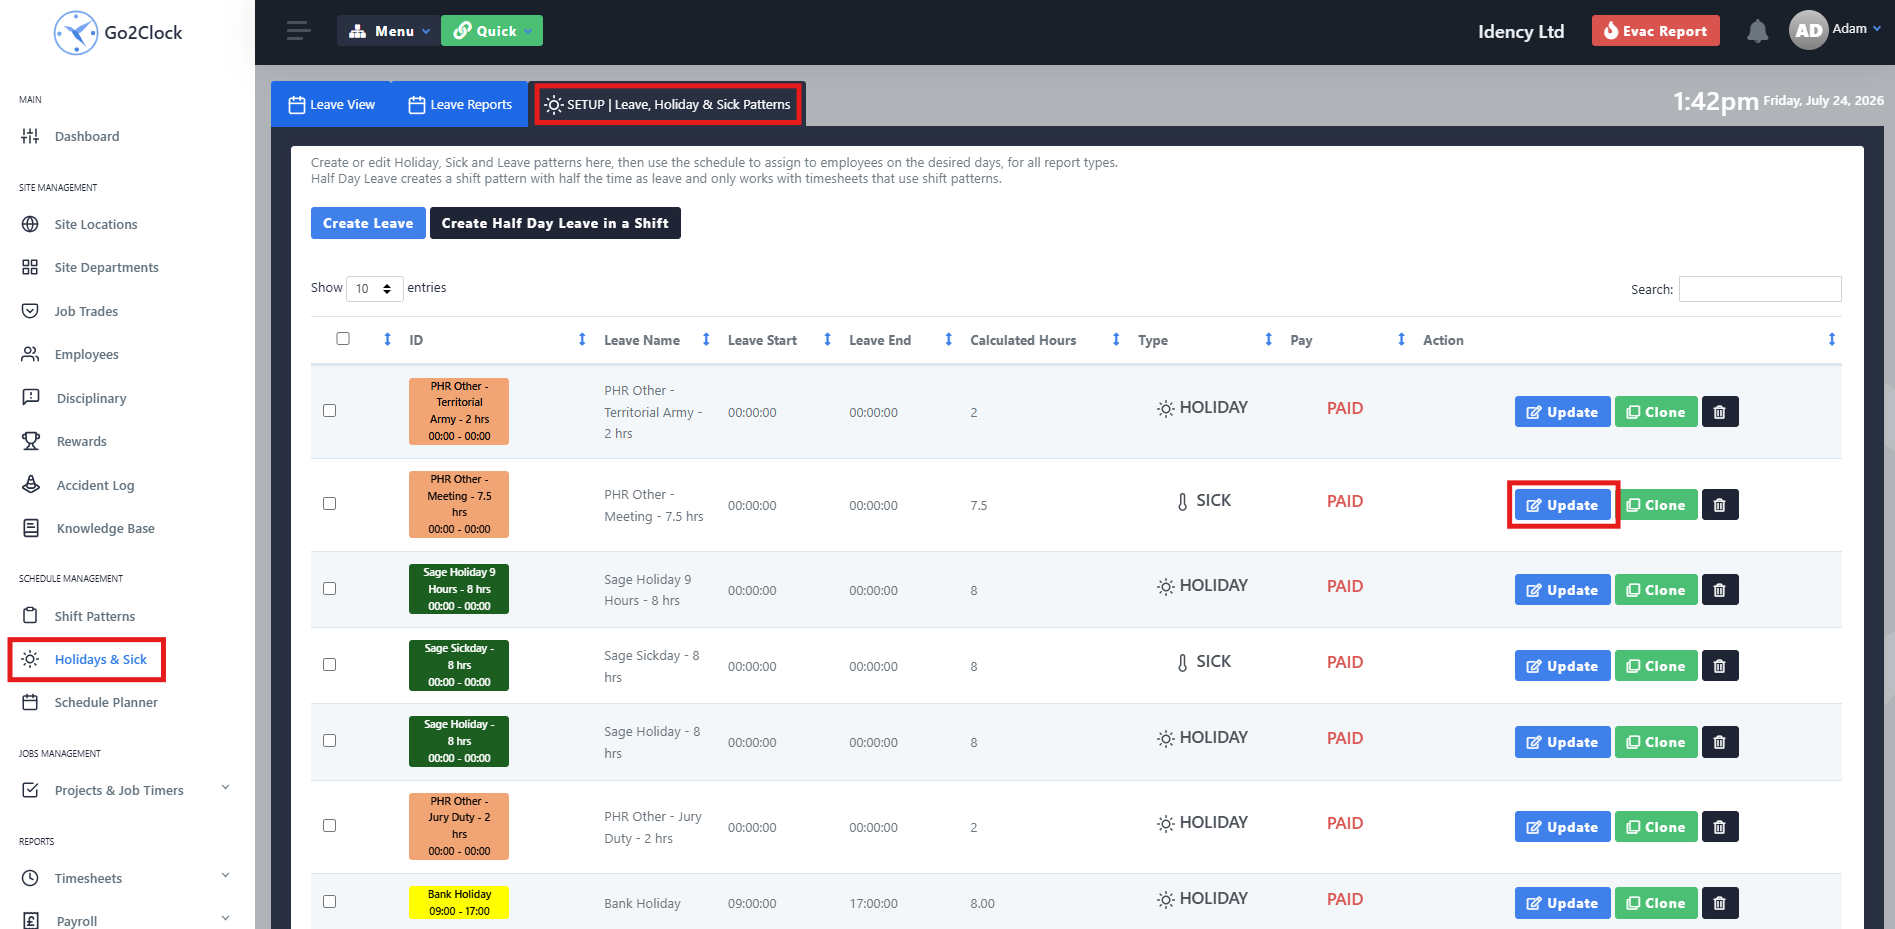
Section 3 | Setting up Full Day Leave
Navigate to the Holiday & Sick tab and select Setup | Leave, Holiday & Sick Patterns. Find the leave pattern that was created and select Update. Note: Other Events from PeopleHR will also pull across as a leave pattern.
Step 2: Configure the Full Day Leave Pattern
Do not change the pattern name as this can cause unintended issues. Select the Shift Times tab and verify the shift times. Select the Leave Type tab and confirm whether the leave should be Paid or Unpaid, and ensure the correct leave type (Holiday or Sick) has been selected.

Step 3: Set the Full Day Payroll Rate
If using Sage Payroll, select the Payroll Rate tab. Under the normal rate, select the appropriate Pay Rate Code to be applied.
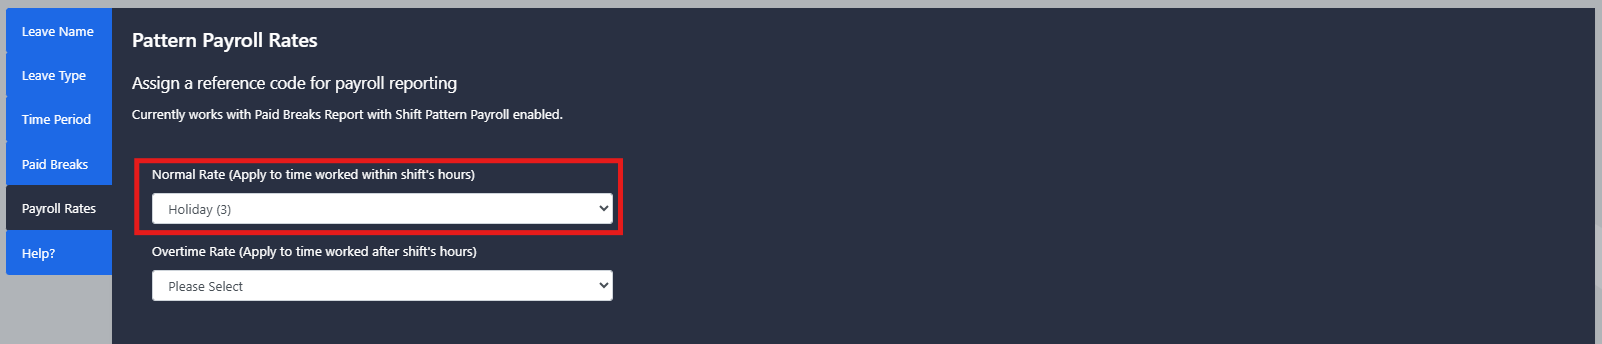
Section 4 | Setting up Half Day Leave
Navigate to Shift Patterns and select Setup Shift Patterns. Find the Holiday or Sick shift pattern that was created and select Update. Do not change the pattern name as this can cause unintended issues.
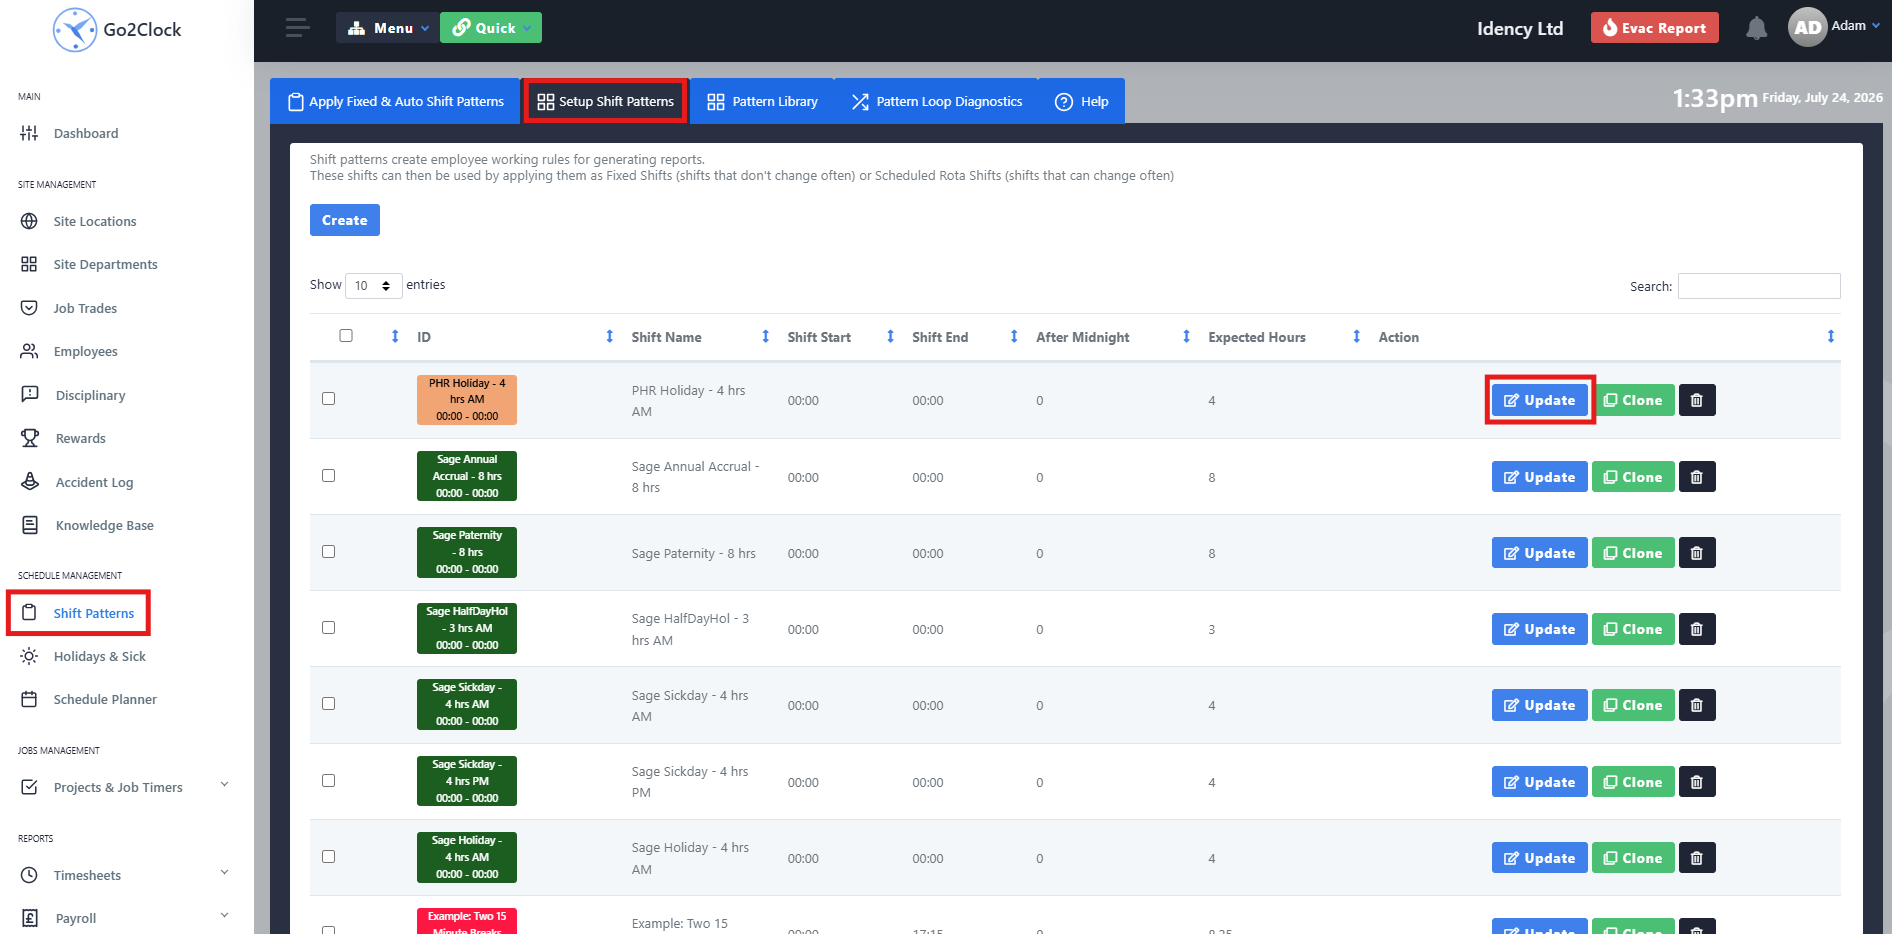
Step 2: Configure the Half Day Holiday & Sick Rules
Open the Holiday & Sick rules tab within the shift pattern. Enter the appropriate leave hours and enable whether it is Sick or Holiday. Specify whether the leave is Paid or Unpaid.
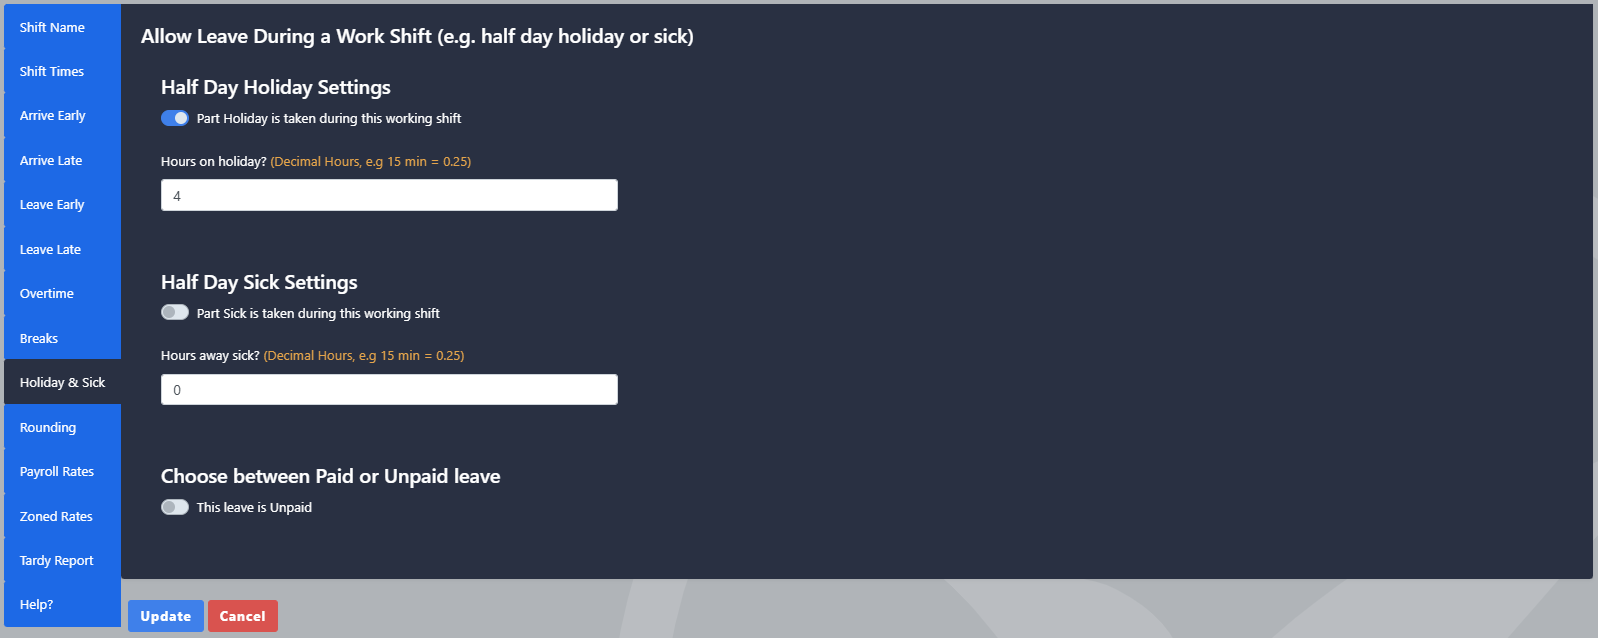
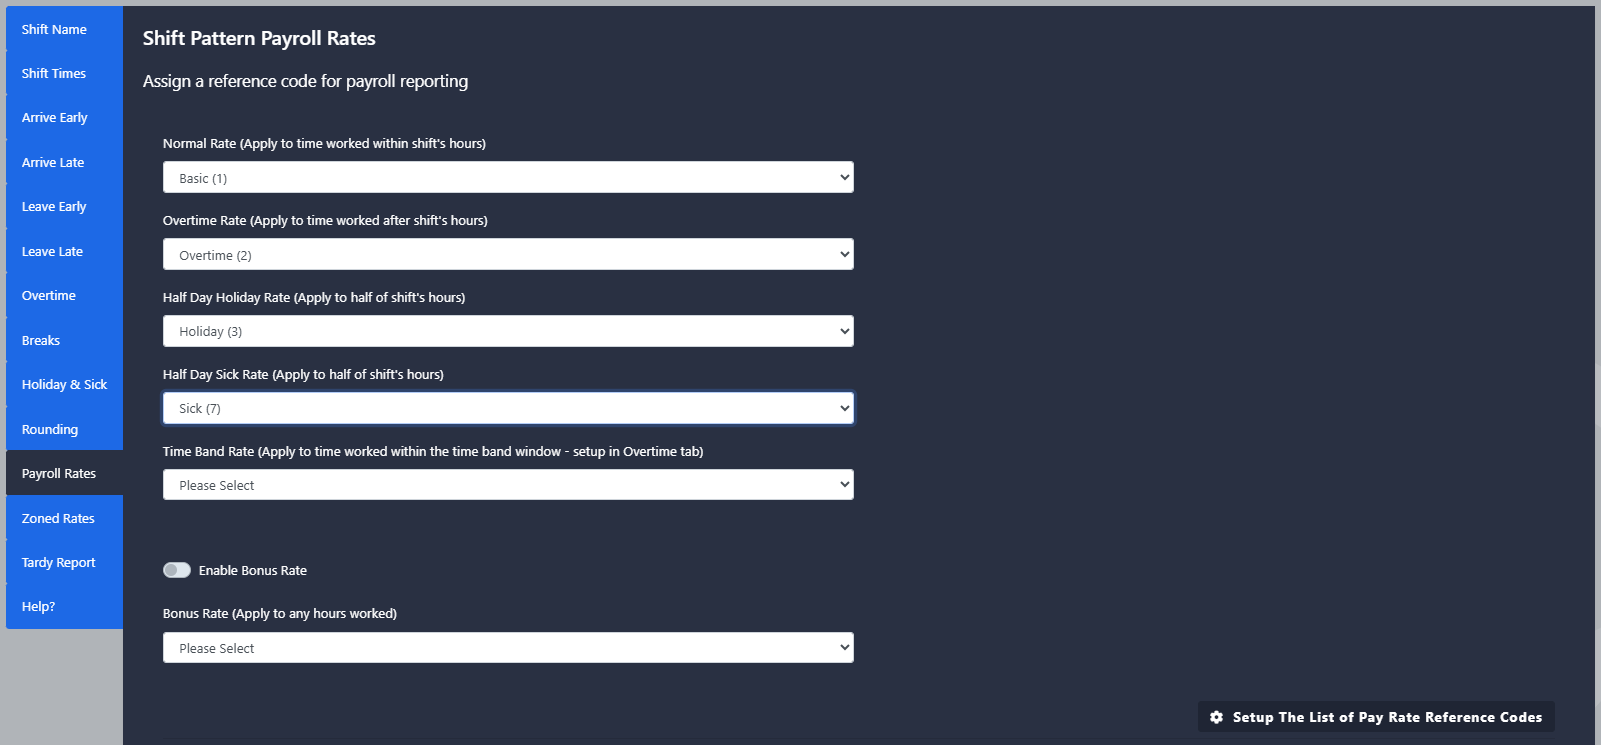
Step 3: Set the Half Day Payroll Rates
If using Sage Payroll, navigate to the Payroll Rates rules tab. Select the half day holiday or sick rate and apply the correct Pay Rate Code.
Troubleshooting
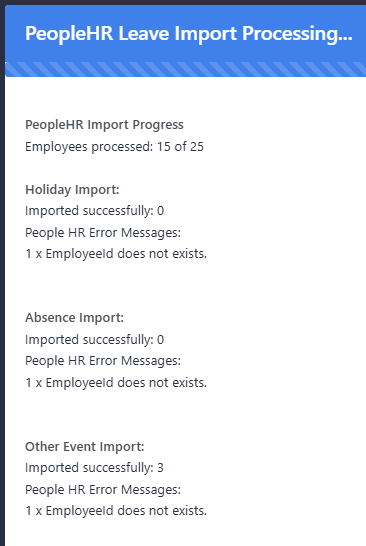
Error Message: The EmployeeId Does Not Exist
This error occurs when an employee within PeopleHR is not associated with anyone in Go2Clock. To fix this, add the PeopleHR ID against the existing employee in Go2Clock, or import the employee directly from PeopleHR.
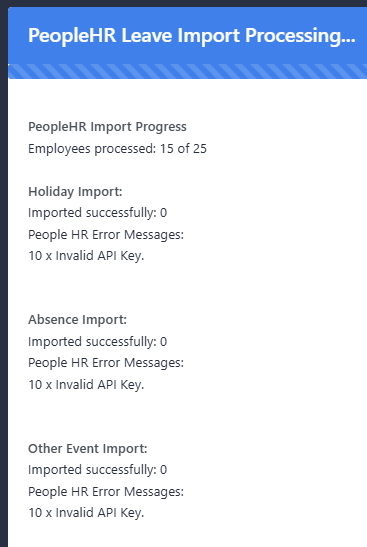
Error Message: Invalid API Key Error
This error occurs when there is an issue with the PeopleHR API key. Either the API key has not been set up with the correct permissions, or the PeopleHR API key and server are incorrectly configured within Go2Clock.

Go2Clock Cloud Hosted Time & Attendance System

















 English (UK)
  English
  English (Canada)
  Français du Canada
  Svenska
  Português
  Nederlands
  Italiano
  Français
  Español
  Deutsch